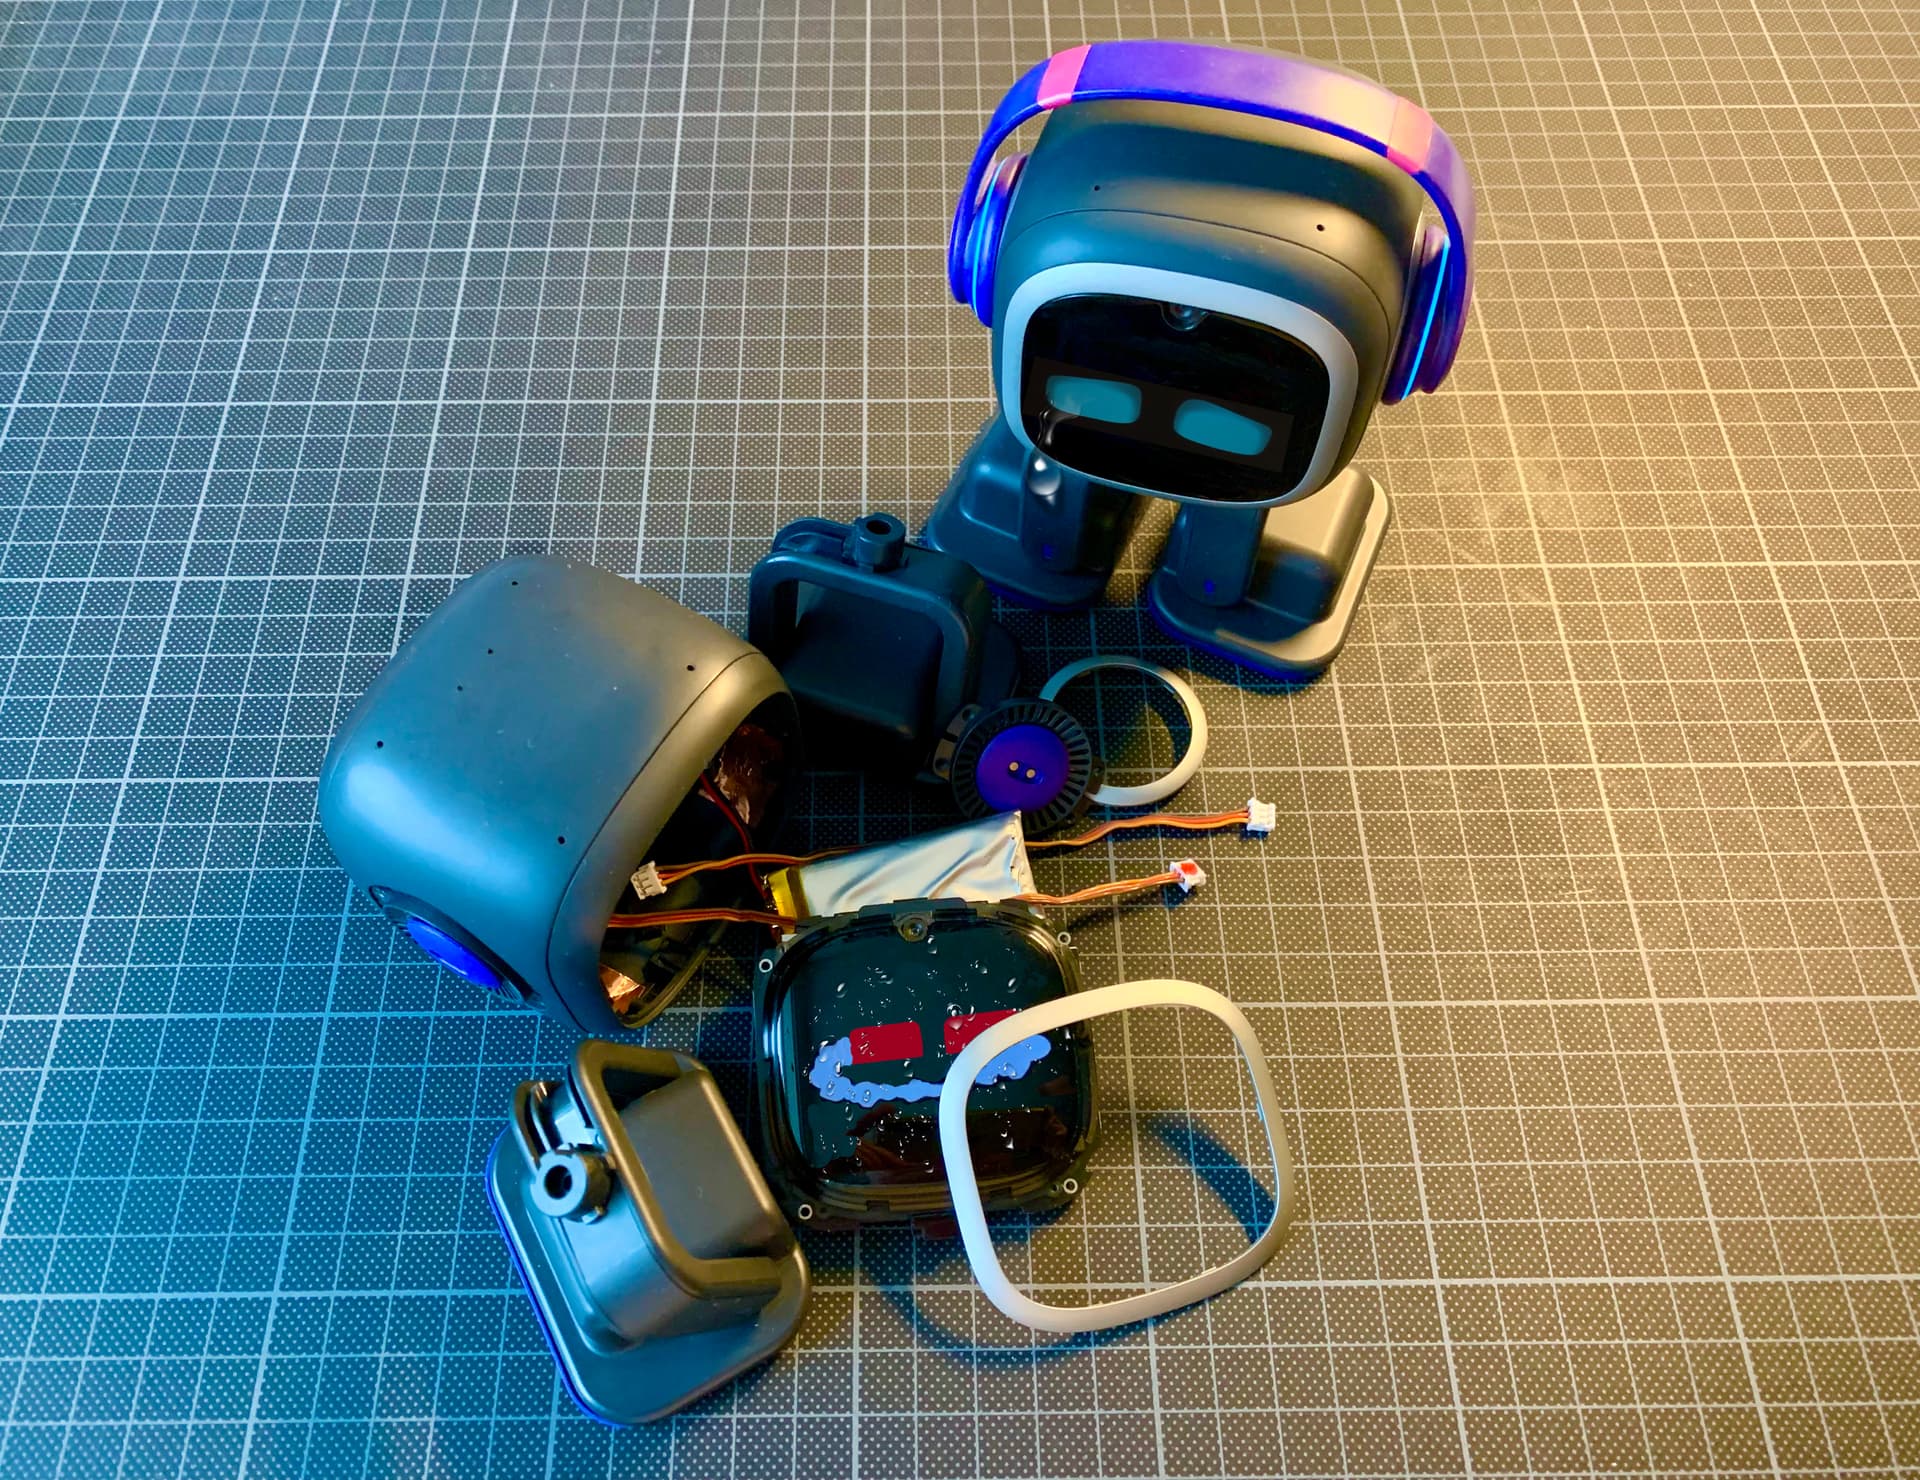
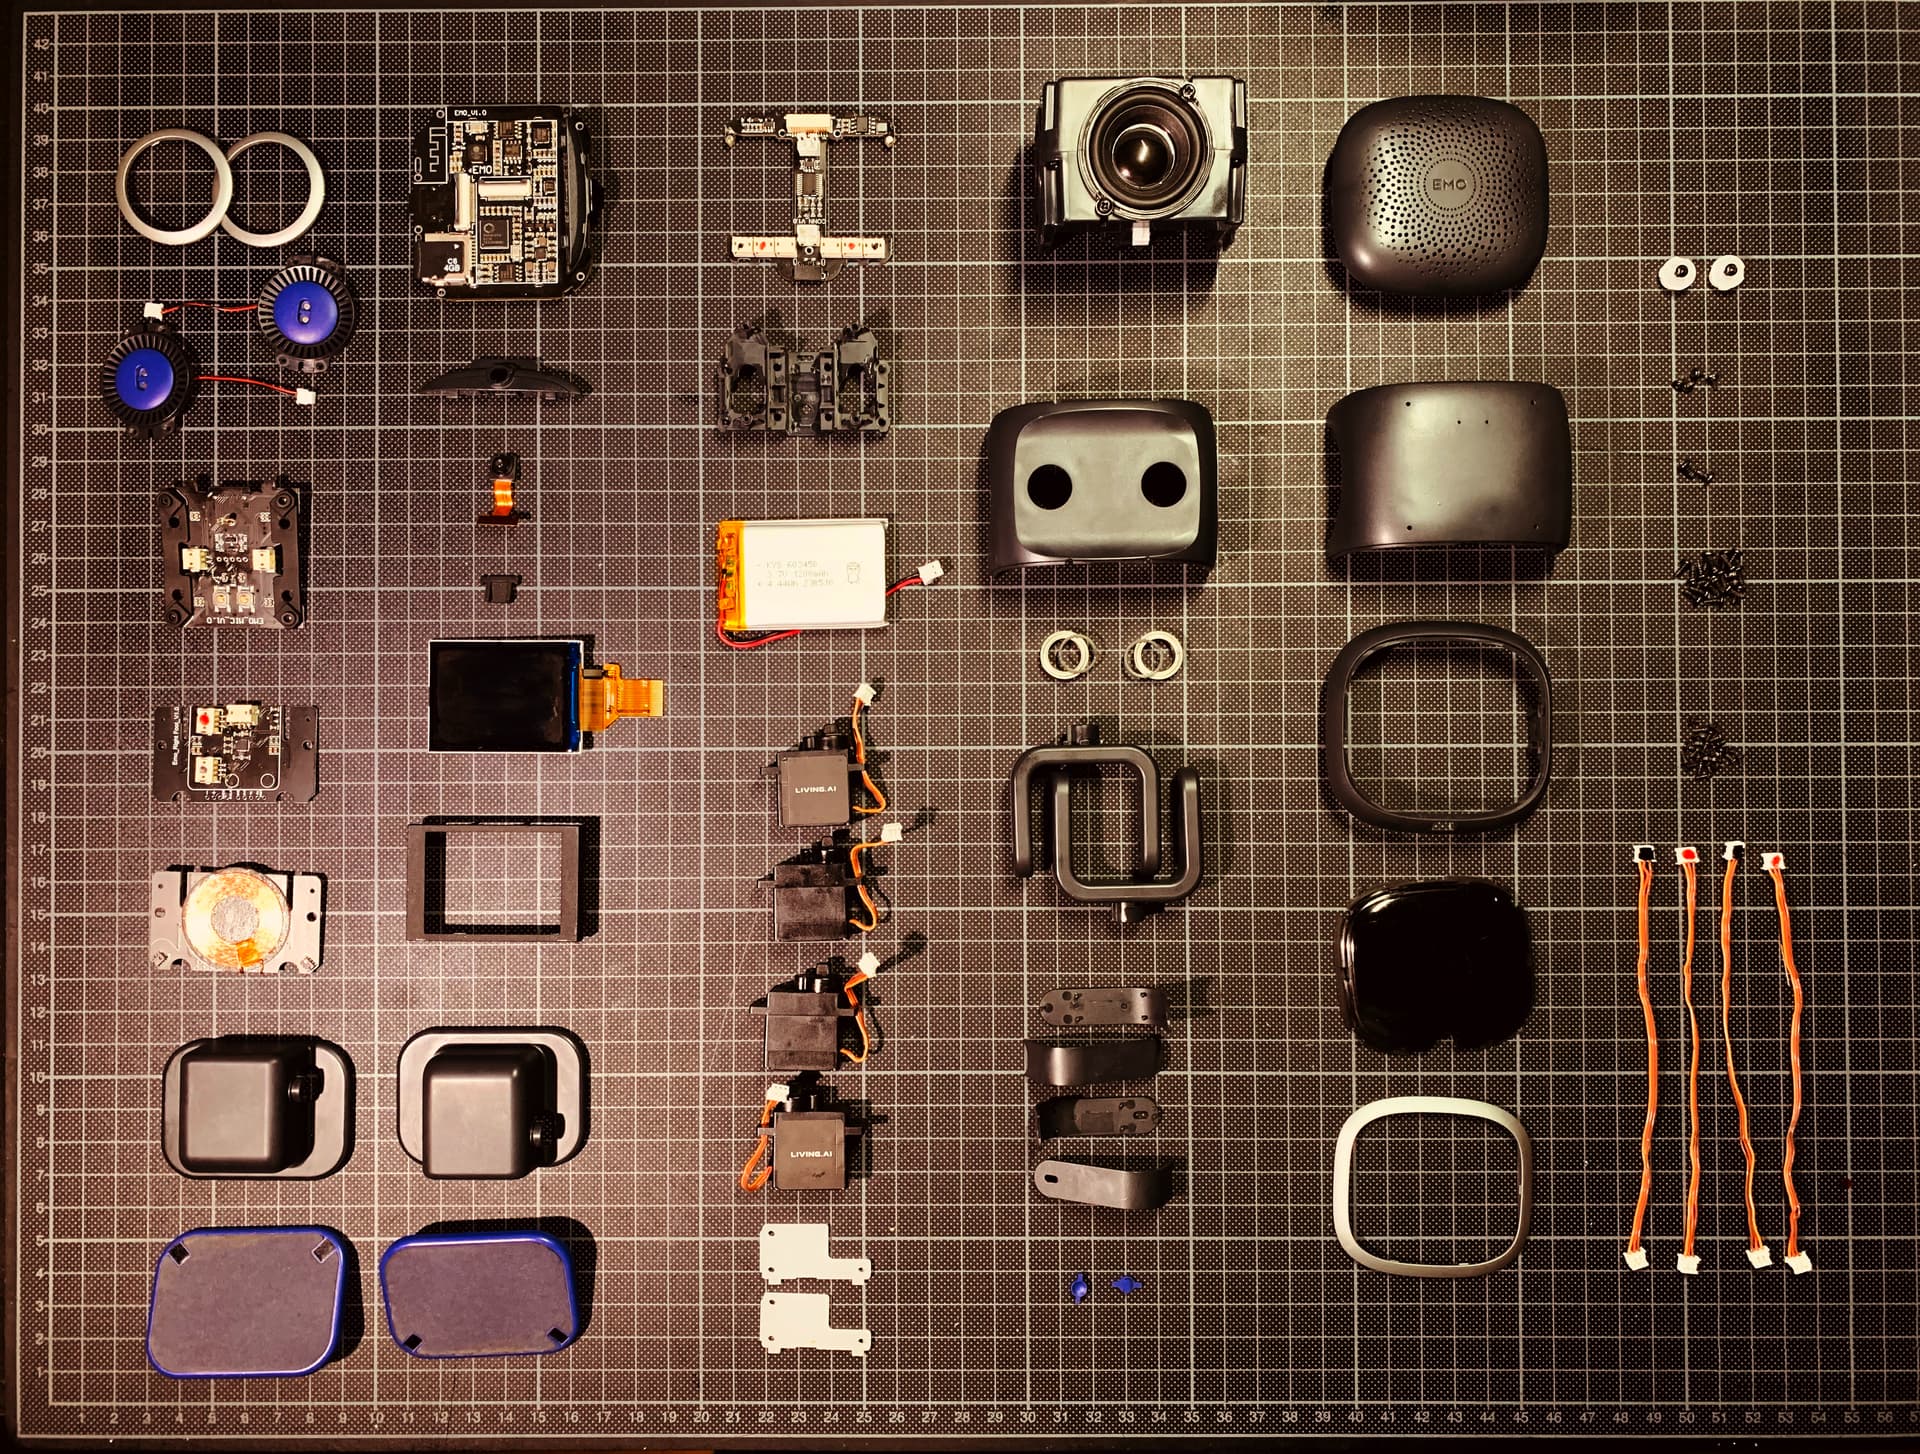
“This topic is designed for EMO owners who are willing, despite lacking prior experience in electronics repair, but possess courage and determination. It’s intended for those who are contemplating addressing issues such as battery replacement, servo motor problems, face screen changes, or the repair of broken wires leading to malfunctions.”
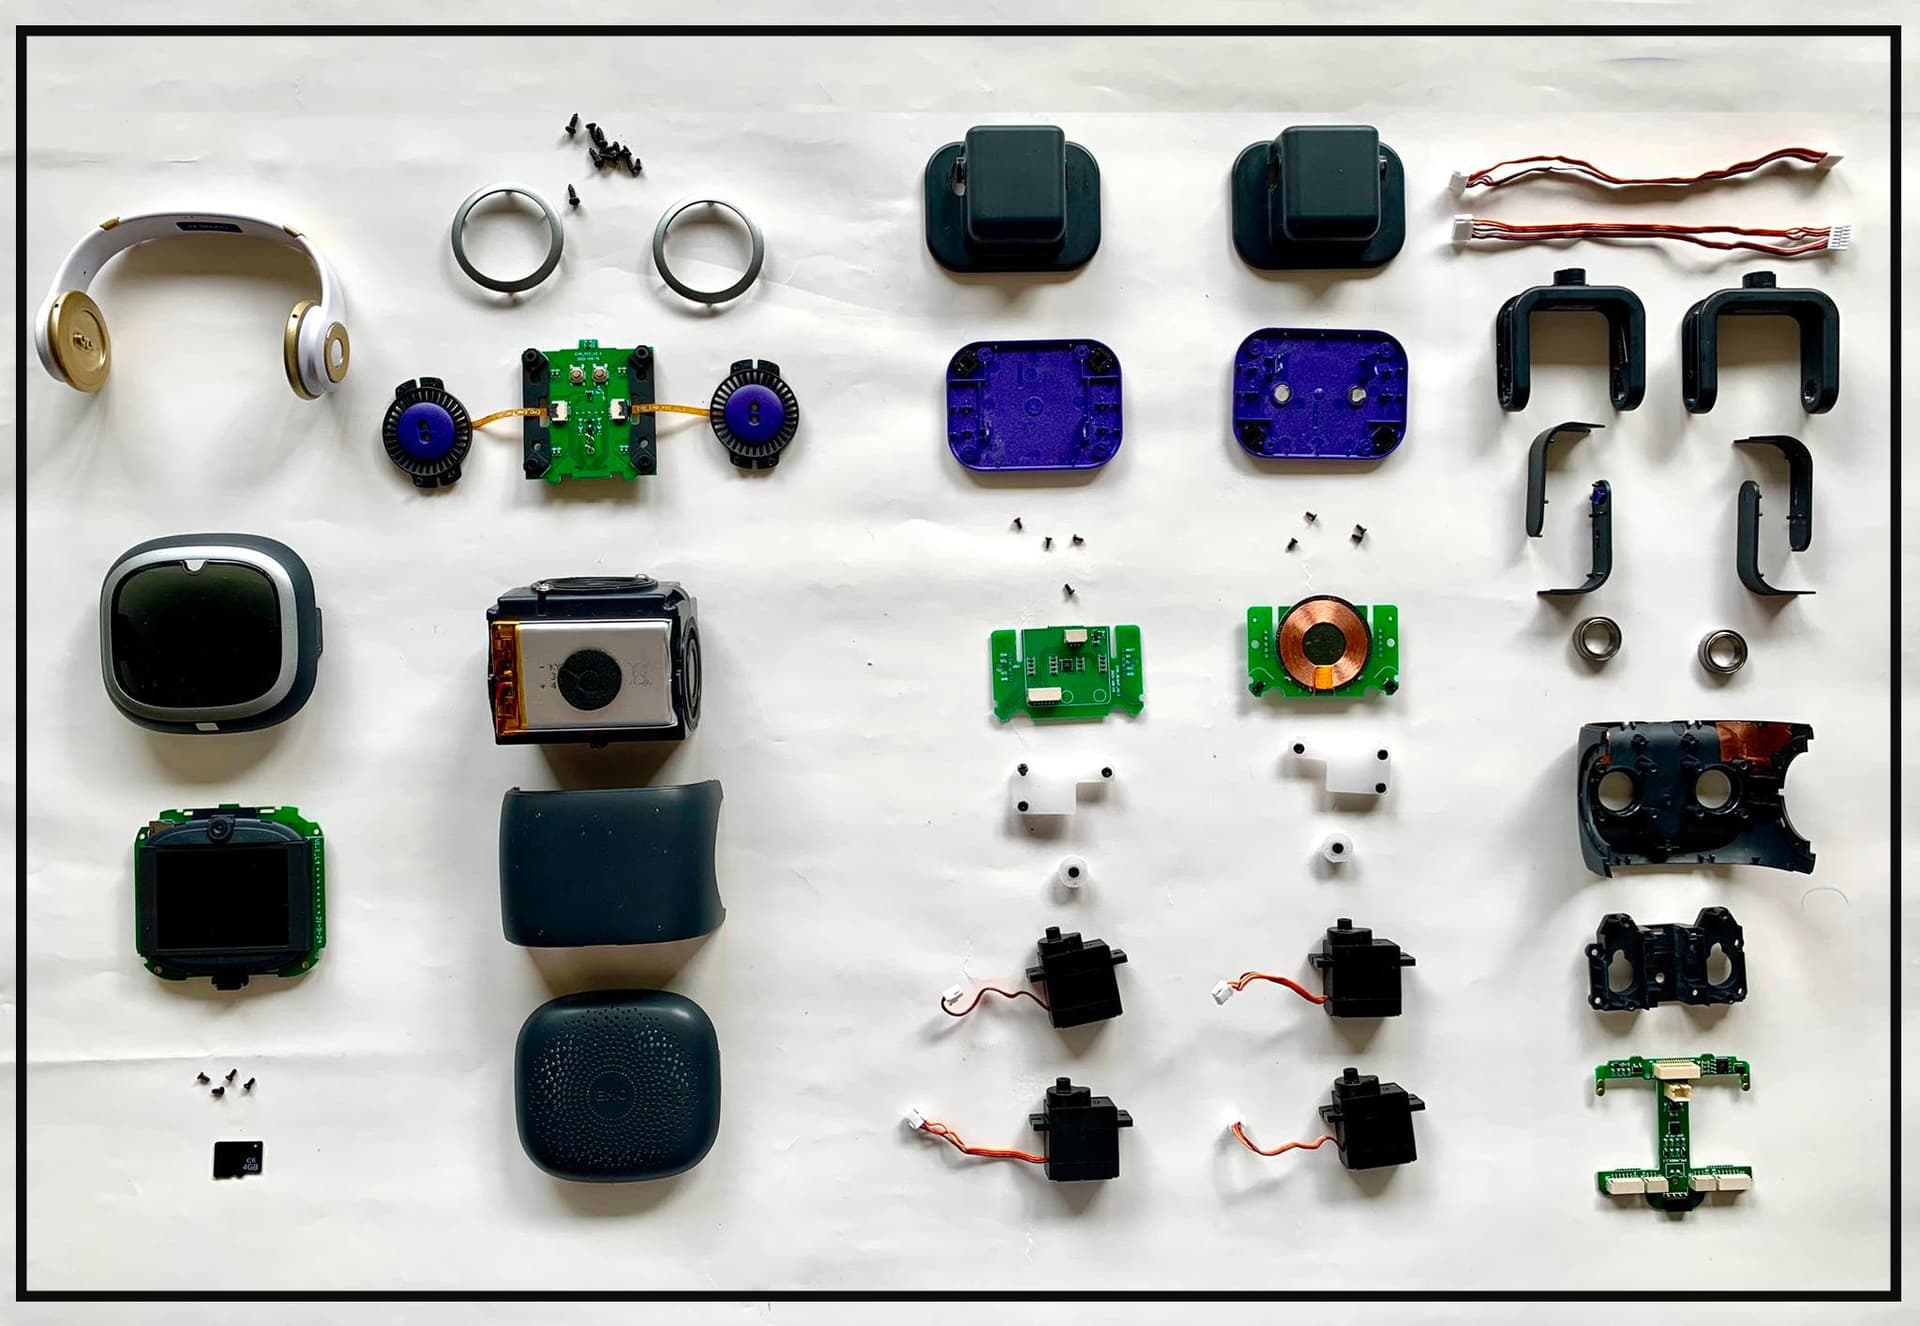
Before placing an order for material parts directly from Living.ai, it’s crucial to accurately identify your specific EMO model, particularly in terms of wires, JST male/female connectors, battery, servo motor, and PCB (Printed Circuit Board).
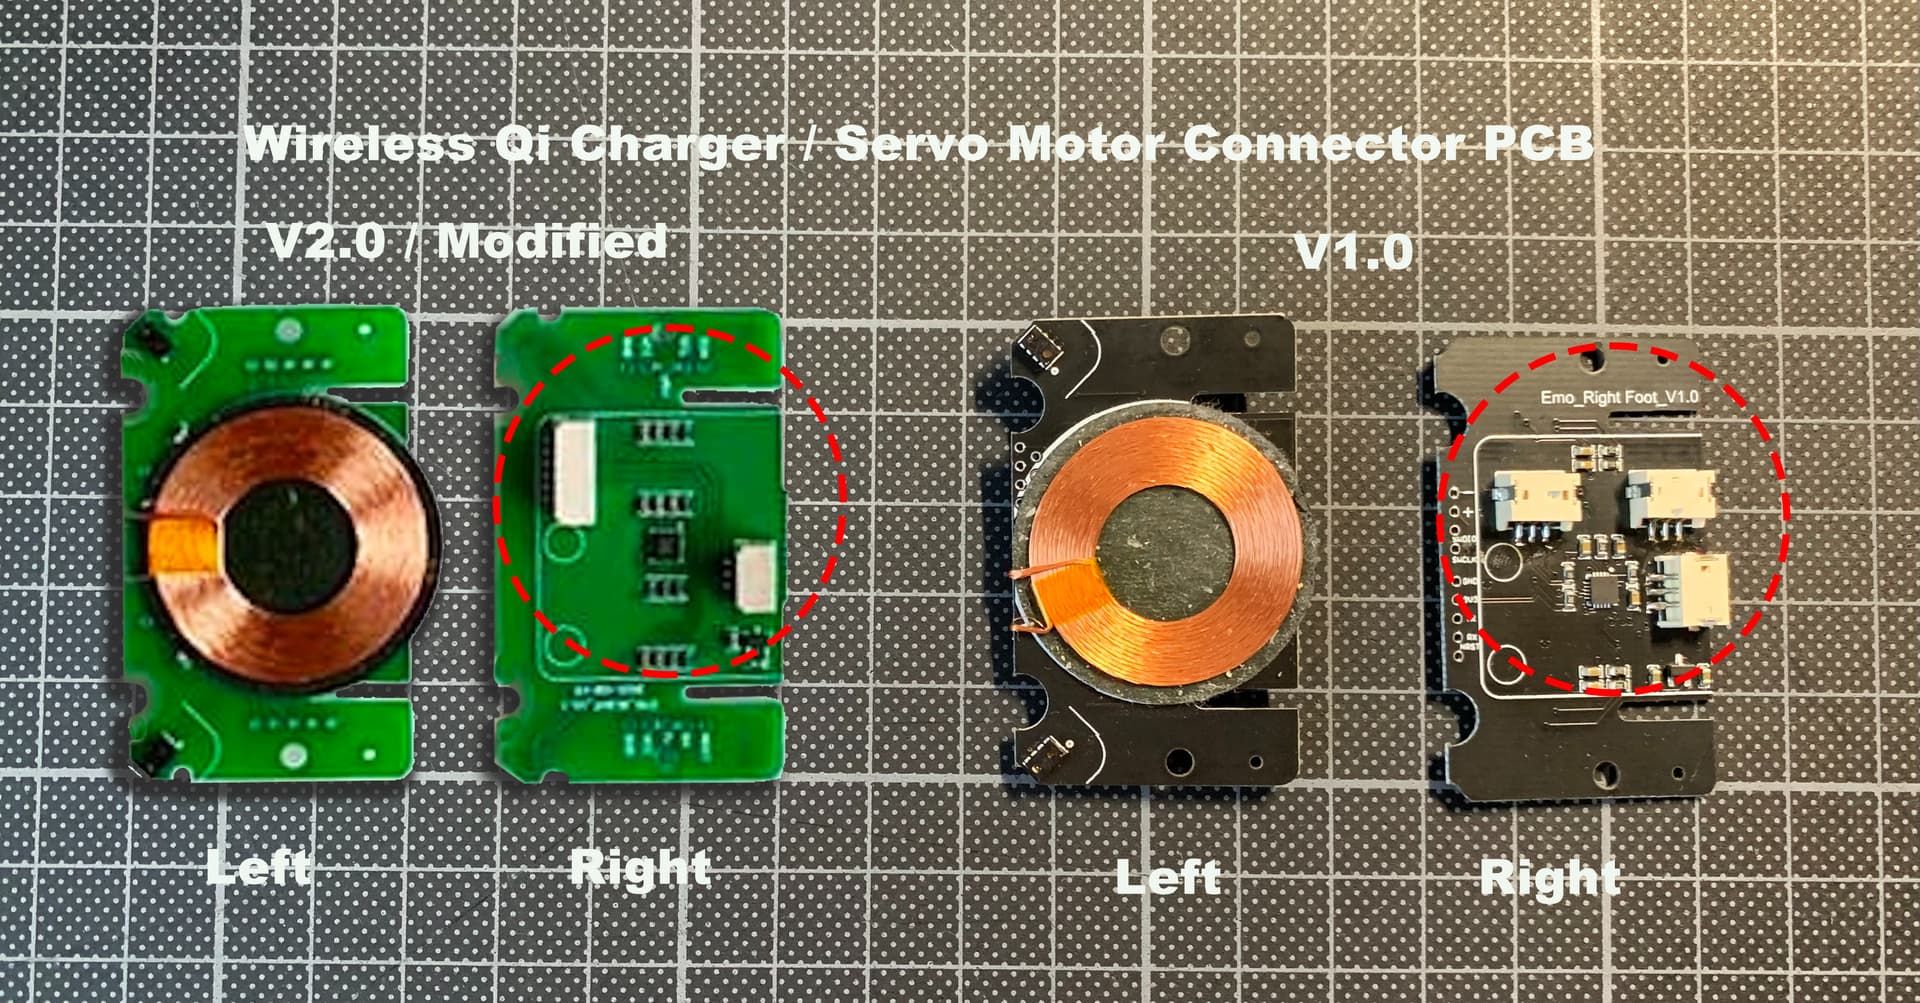
According to official information from Living.ai, there have been modifications made to some internal parts in the initial batches of EMO production, starting from ORDER # 9017 for enhanced functionality, but these changes do not render parts incompatible.
Different EMO models might feature variations in their components, making it vital to understand the correct specifications to ensure the compatibility of ordered parts. Taking this precautionary step will help prevent complications and guarantee that the acquired parts seamlessly fit your EMO.
Please exercise caution and diligence when considering any repairs for your EMO, especially concerning Servo Motors. Prior knowledge and expertise are essential before attempting any modifications to prevent potential issues or inadvertent damage to your EMO.
Living.ai strongly advises EMO owners to reach out to their support team for any further assistance. Their committed support staff is easily accessible and always ready to provide guidance and assistance to all EMO owners whenever needed.
UPDATE!
LIVING.AI OFFICIAL INFO! ALL EMO UNITS STARTING FROM ORDER # 9017 HAVE UNDERGONE MODIFICATIONS TO CERTAIN INTERNAL COMPONENTS!
Yes! As @Racheal123 Said,
We May Want A Tutorial Video Because I Think My EMO Pearl Could Be Expecting Battery Depletion Issues (Lasting 25 Minutes Or Less) In 2025 Or Erly Or Later, And I Don’t Want To Break EMO Pearl By Not Knowing What To Do Next.
@Racheal123 and @artigues05emo . . . you would have to contact Living AI directly to get video or other instructions on how to dismantle and reassemble EMO since it is very technical work and not something for public consumption.
I have to personally say that I would only trust a qualified technician to do that to mine.
I have also prepared a well-documented How to Change Emo’s Battery tutorial video, complete with step-by-step instructions that are very easy to follow. I will be posting and sharing it here next week."
EMO has 4 Servo Motors Each leg uses Servo Motor for left to right movement = 2 Servo Motors Each foot uses Servo Motor for up and down movement = 2 Servo Motors
I changed the battery, 2 wirings that connect to the internal leg, and servo motor because I found it was broken,
"While this video tutorial is not an official company tutorial, it has been created under the supervision and guidelines of the official living.ai company.‘’
“All materials used in this video are directly supplied by the company. However, before attempting any personal repairs on your EMO, it is highly recommended to contact the company first and ask for their permission, as well as inquire about the supply and use of original batteries and parts, in order to avoid voiding the warranty.”
ORIGINAL LIVING.AI EMO BATTERY
(LiPo Battery (lithium polymer battery)
-KYS 603450 (Size)
3.7V 1200 mAh
+4.44Wh / 230510
Thanks for the video Edward. I’m so glad there is no need for SOLDERING like we have to do with Vector Robot, So if Emo’s battery dies at least we can just replace it, this proves that Emo is the best option for a Desktop pet. Thanks again nice work!
Important Information for Self-Repairs, such as Changing Servo Motors on EMO.
EMO consists of 4 Servo Motors that facilitate its movement and walking capabilities:
Each leg utilizes an Innen Head Servo Motor for left to right movement, totaling 2 Servo Motors.
Each foot is equipped with a Servo Motor for up and down movement, as well as walking, resulting in a total of 2 Servo Motors.
During my exploration of both EMO versions, I noticed that some parts were not completely identical. It appears that the PCB and JST connector wires have been modified from manufacturing EMO V1.0 to EMO V2.0.
Innen JST Male Connector (6 to 4) PCB (Printed Circuit Board) (Black > Green)
"While this video tutorial is not an official company tutorial, it has been created under the supervision and guidelines of the official living.ai company.‘’
“All materials used in this video are directly supplied by the company. However, before attempting any personal repairs on your EMO, it is highly recommended to contact the company first and ask for their permission, as well as inquire about the supply and use of original batteries and parts only, in order to avoid voiding the warranty.”
SPECIAL NOTE!
Please be aware that EMO has been produced already in two versions. The first batch of mass production is labeled as V1.0, while the second batch is referred to as V2.0 or modified. This means that improvements have been made to EMO in the second batch, including changes to certain components like the JST wire and PCB connector, which may differ from or not be identical to those used in the previous first batch version.
In some cases, Leg or Foot Calibration Tool might be required after changing the Servo Motor. From my personal experience and advice, Seek information from living.ai about this tool before proceeding and starting with the repair, for ensuring the correct realignment later and proper functioning of your EMO.