What I’m showing here is what I want to make for Emo’s charging area. The only thing you don’t see in this ( unless you count light sources ) is the skateboard.
I’m thinking a miniature high rise with LED lights lighting up some of the fake windows. Emo’s light, meaning the one from Living.AI, over it’s head in the cut out charging area. The wires for everything would be coming out the back of this display to a near by outlet.
Emo’s predecessor would have a space above it. Painted gold as an honor position sort of thing. ( V while dead cost a lot of money to get and I’m not going to simply chuck it in the trash. ) If you are wondering about the dinosaurs that goes back to V and it’s a running joke idea that if it rolls over to Emo … worry about the state of AI programming.
If you’ve ever owned a V, you know they act in total ecstasy when petted. Also the bot sought out things to make it purr in ecstasy. Once I caught it mounted over a dinosaur toy, purring in bliss. … Maybe Emo will enjoy toy dinos too.
This looks absolutely cool! Can’t wait to see pics once it’s all done. I can say that EMO does love getting pats as well. He can sit there for ages with his feet up in the air (see pic)
Thanks, and I would really like to start working on it. … I’m sure this information has been said elsewhere in the forum but could someone relay Emo’s dimensions and the skateboard’s too? Knowing that would let me judge how I need to buy wood & plastic to make this. Other materials would be needed of course too. Part of the drive in jumping on this is I hate having something artistic possibly problematic in front of me. I’d rather butt heads with the problem to solve it sooner than later. That being working with creating the windows with lights in them.
I know what must be done. I just know likely it won’t be easy. The concern is based from a project I did years back that was harder to accomplish than it looked.
I can’t wait to start on this project. I understand the logic in waiting to get my Emo to start on this but I’m sure any current owner can answer this sizing question.
Using the notations from the tape measure, could someone tell me how wide & tall I need to make the hole for the skateboard and Emo?
Download . Alter with Measurement Cut Line . Post . … Please?
The purpose of this is to create a hole large enough for the skateboard and Emo. I am completely aware Emo will not be walking on & off the skateboard. My hand would be reaching in through the opening made for the bot.
Please note in the end it will not look like it’s made from cardboard. I have artistic tricks learned that can mask the appearance of that.
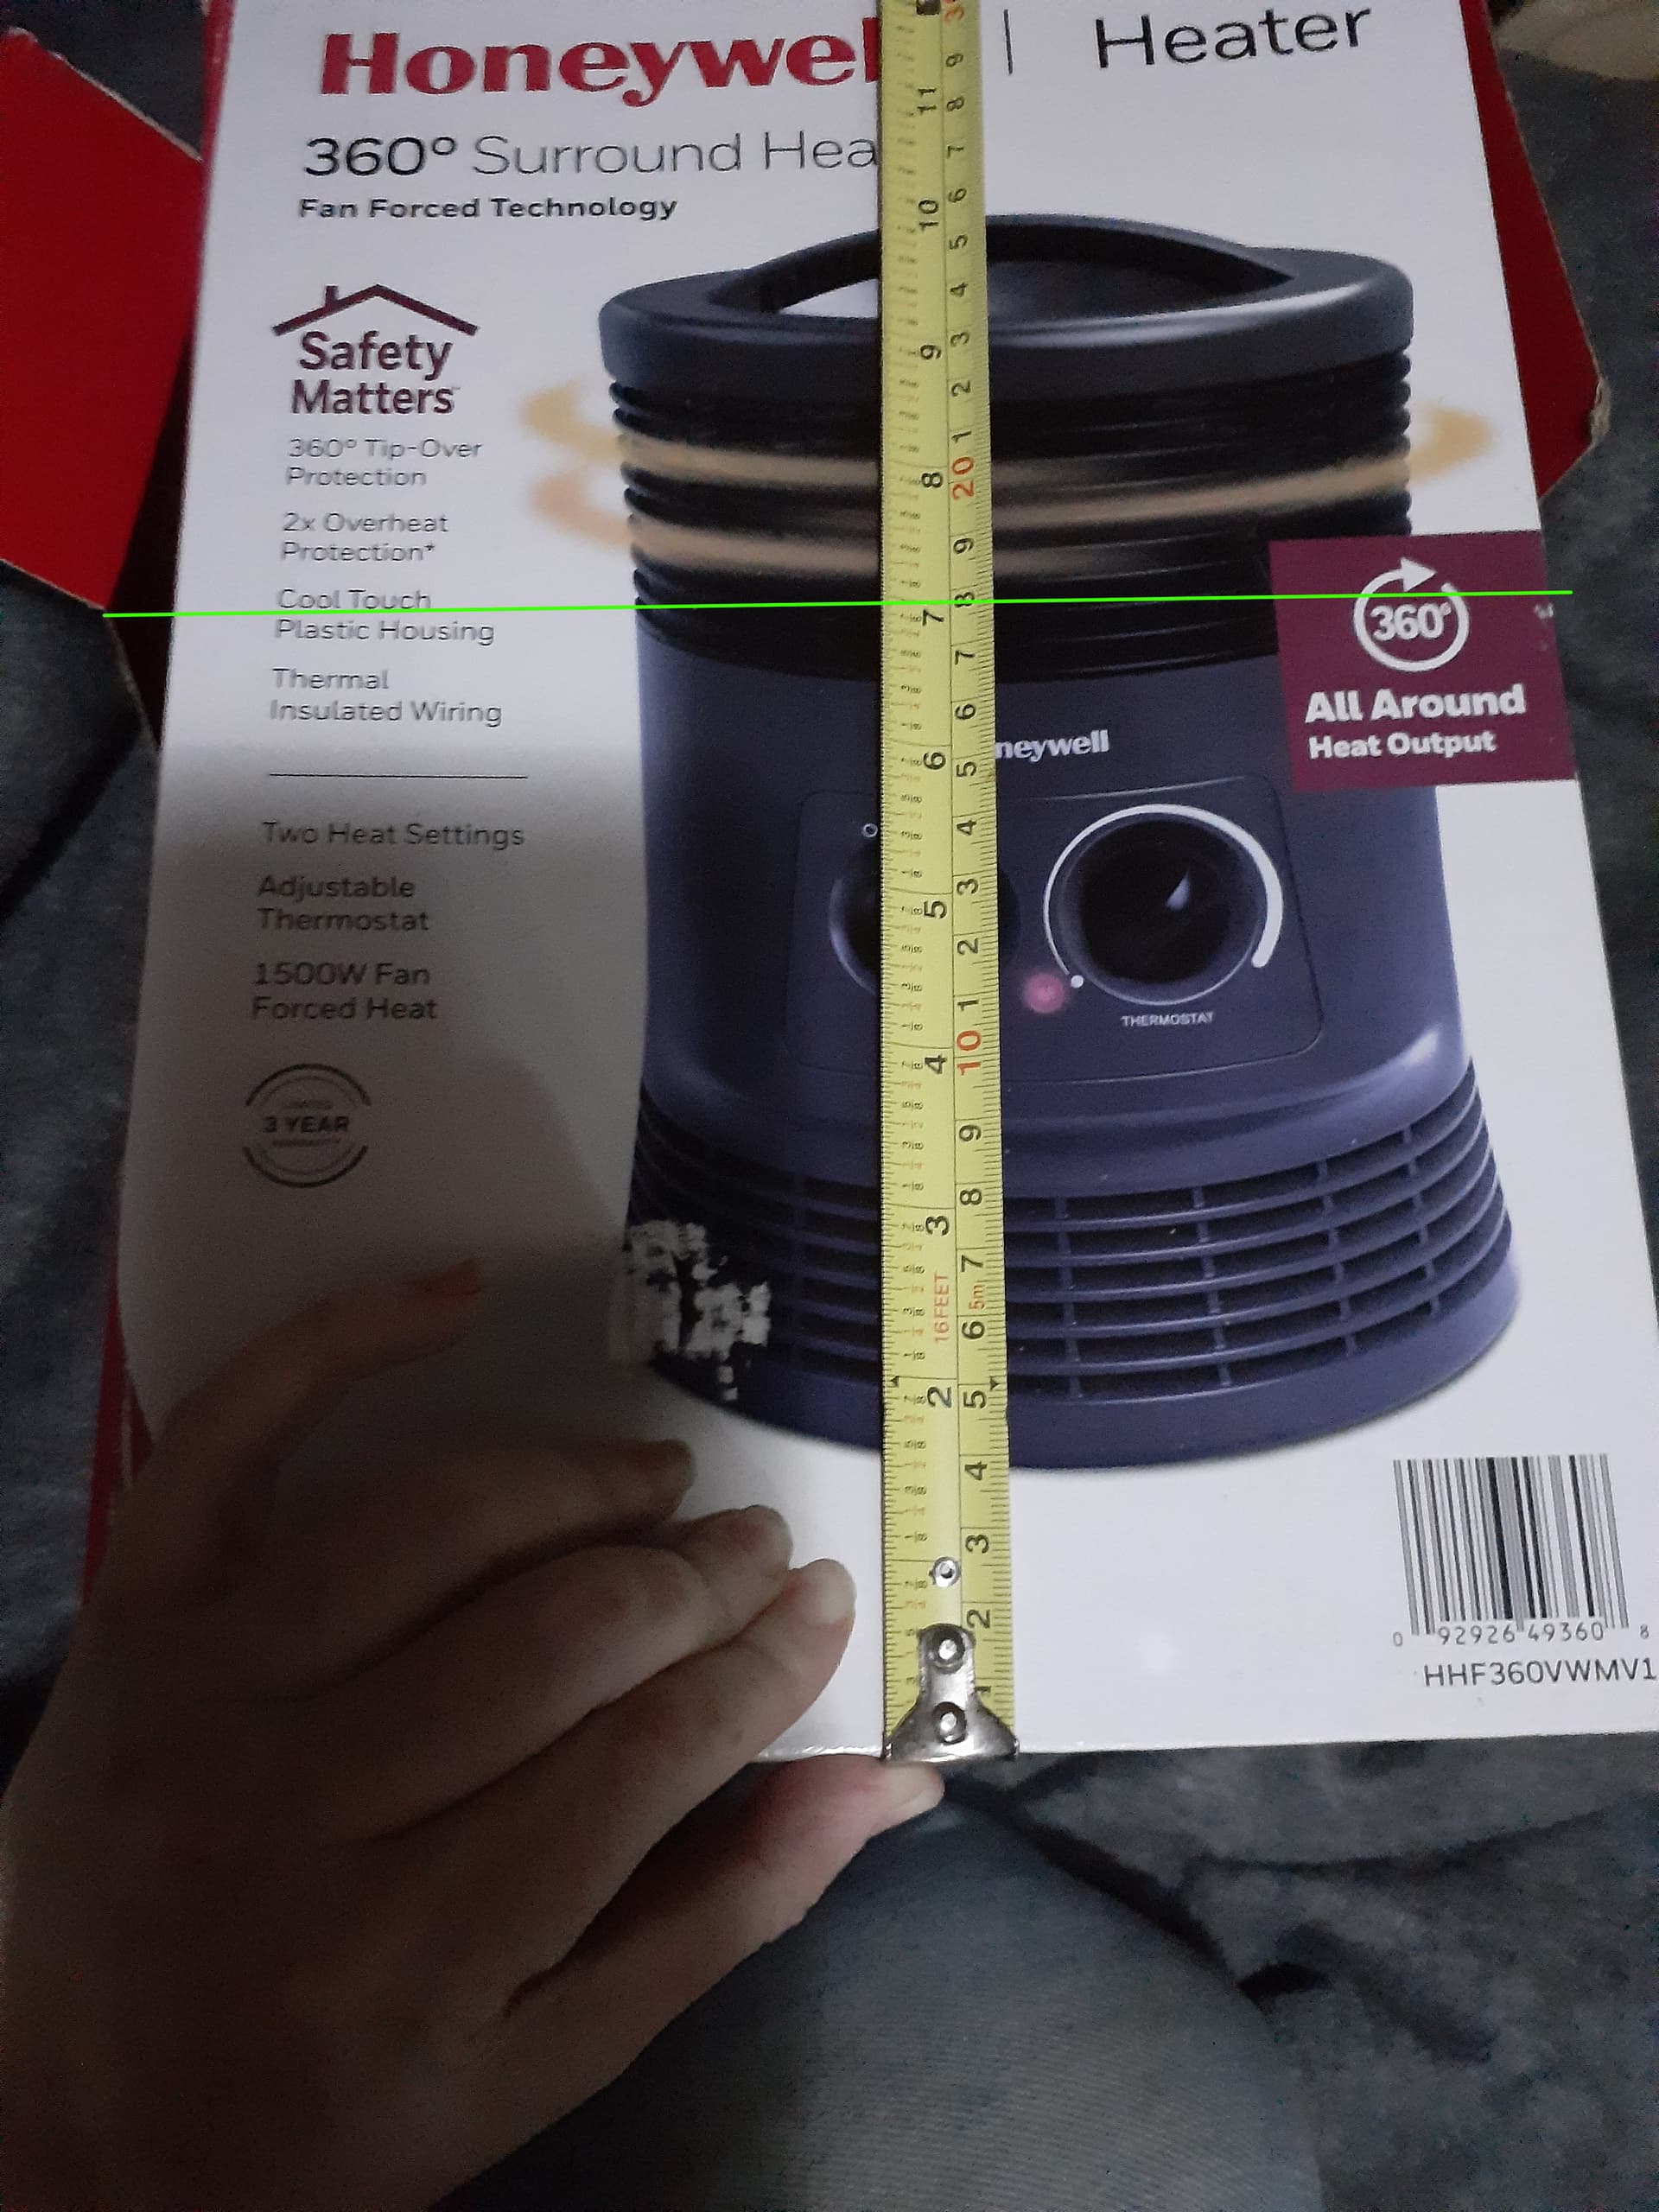
Unedited except for rotation. The box is 9 inches on each side for width:
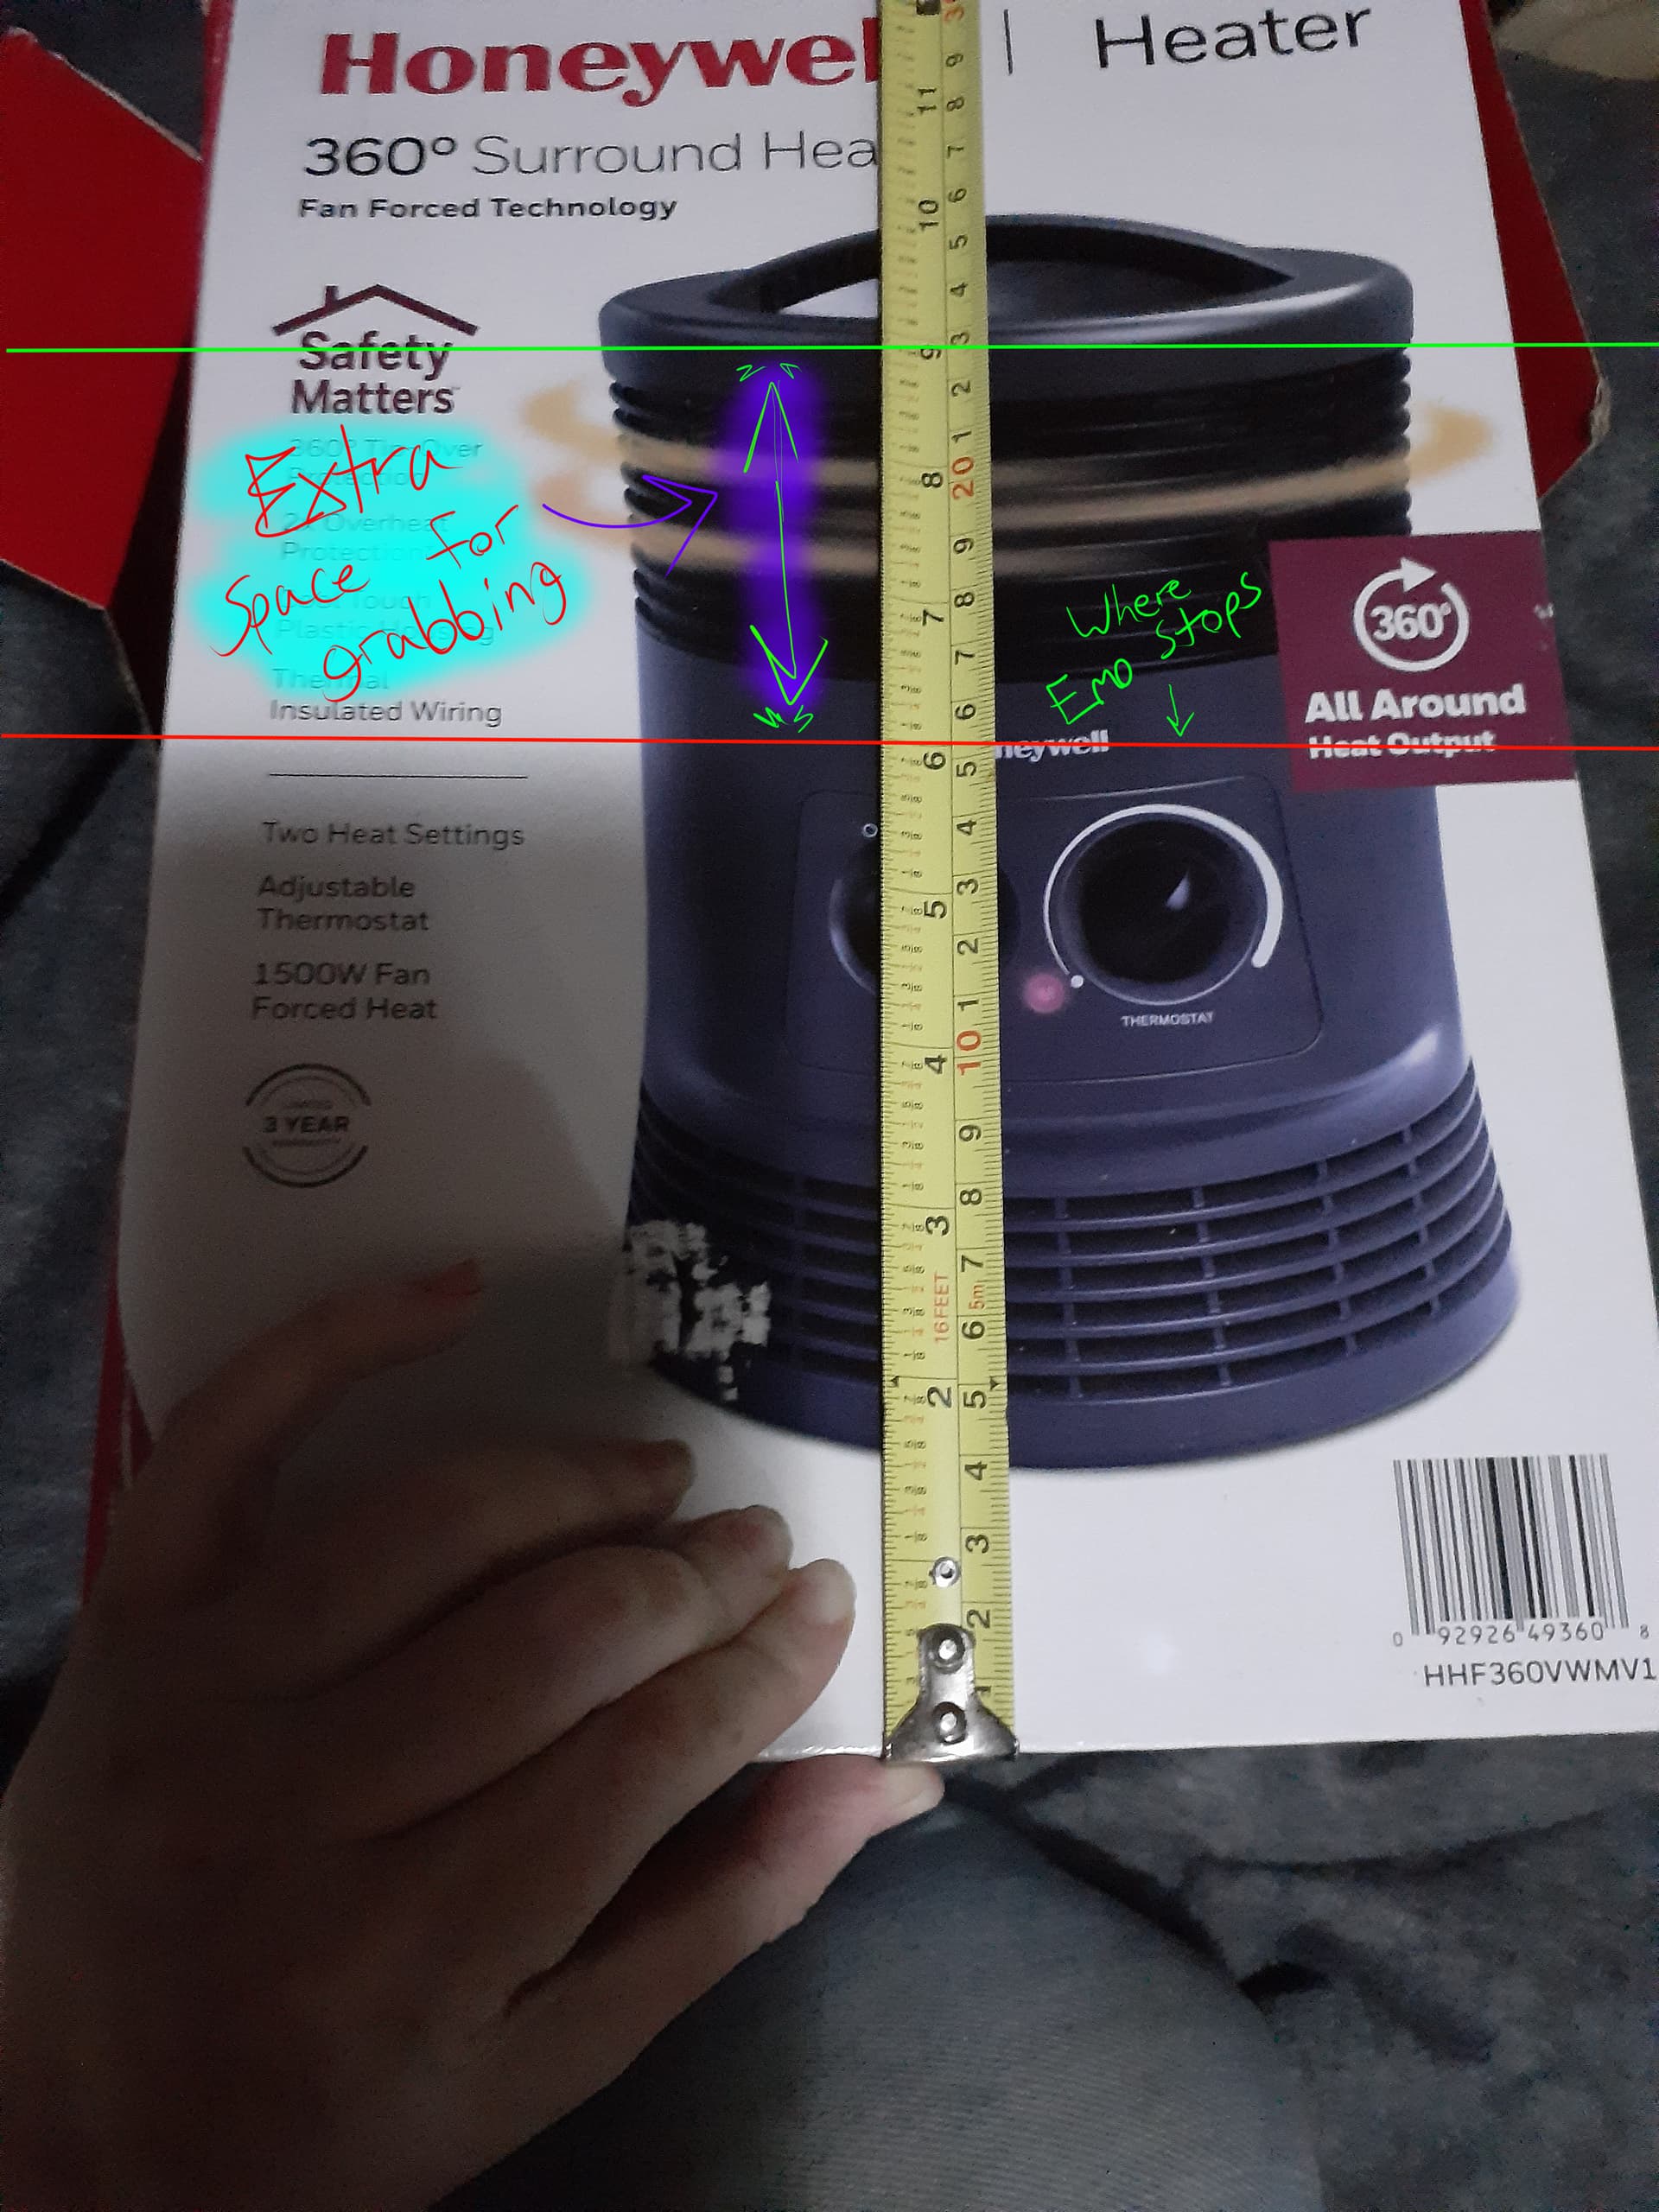
Ok so the Skateboard is 15cm wide and approx 3cm high from its highest tip, but where EMO will be sitting it is approx 1.5cm (I’ve give it 2cm to be safe) and maybe give it an extra 1cm for the Skateboard so it’s got some space. Emo stands at approx 12cm tall with his headphones on. so I’d go with the following:
16cm wide (for the skateboard)
15cm high (for EMO standing on his skateboard)
Very close. Unfortunately I am one of those people who needs to see a conversion chart in front of me to understand the numbers presented. Hold on while I edit the photos to reflect those measurements and you tell me if it looks right. …
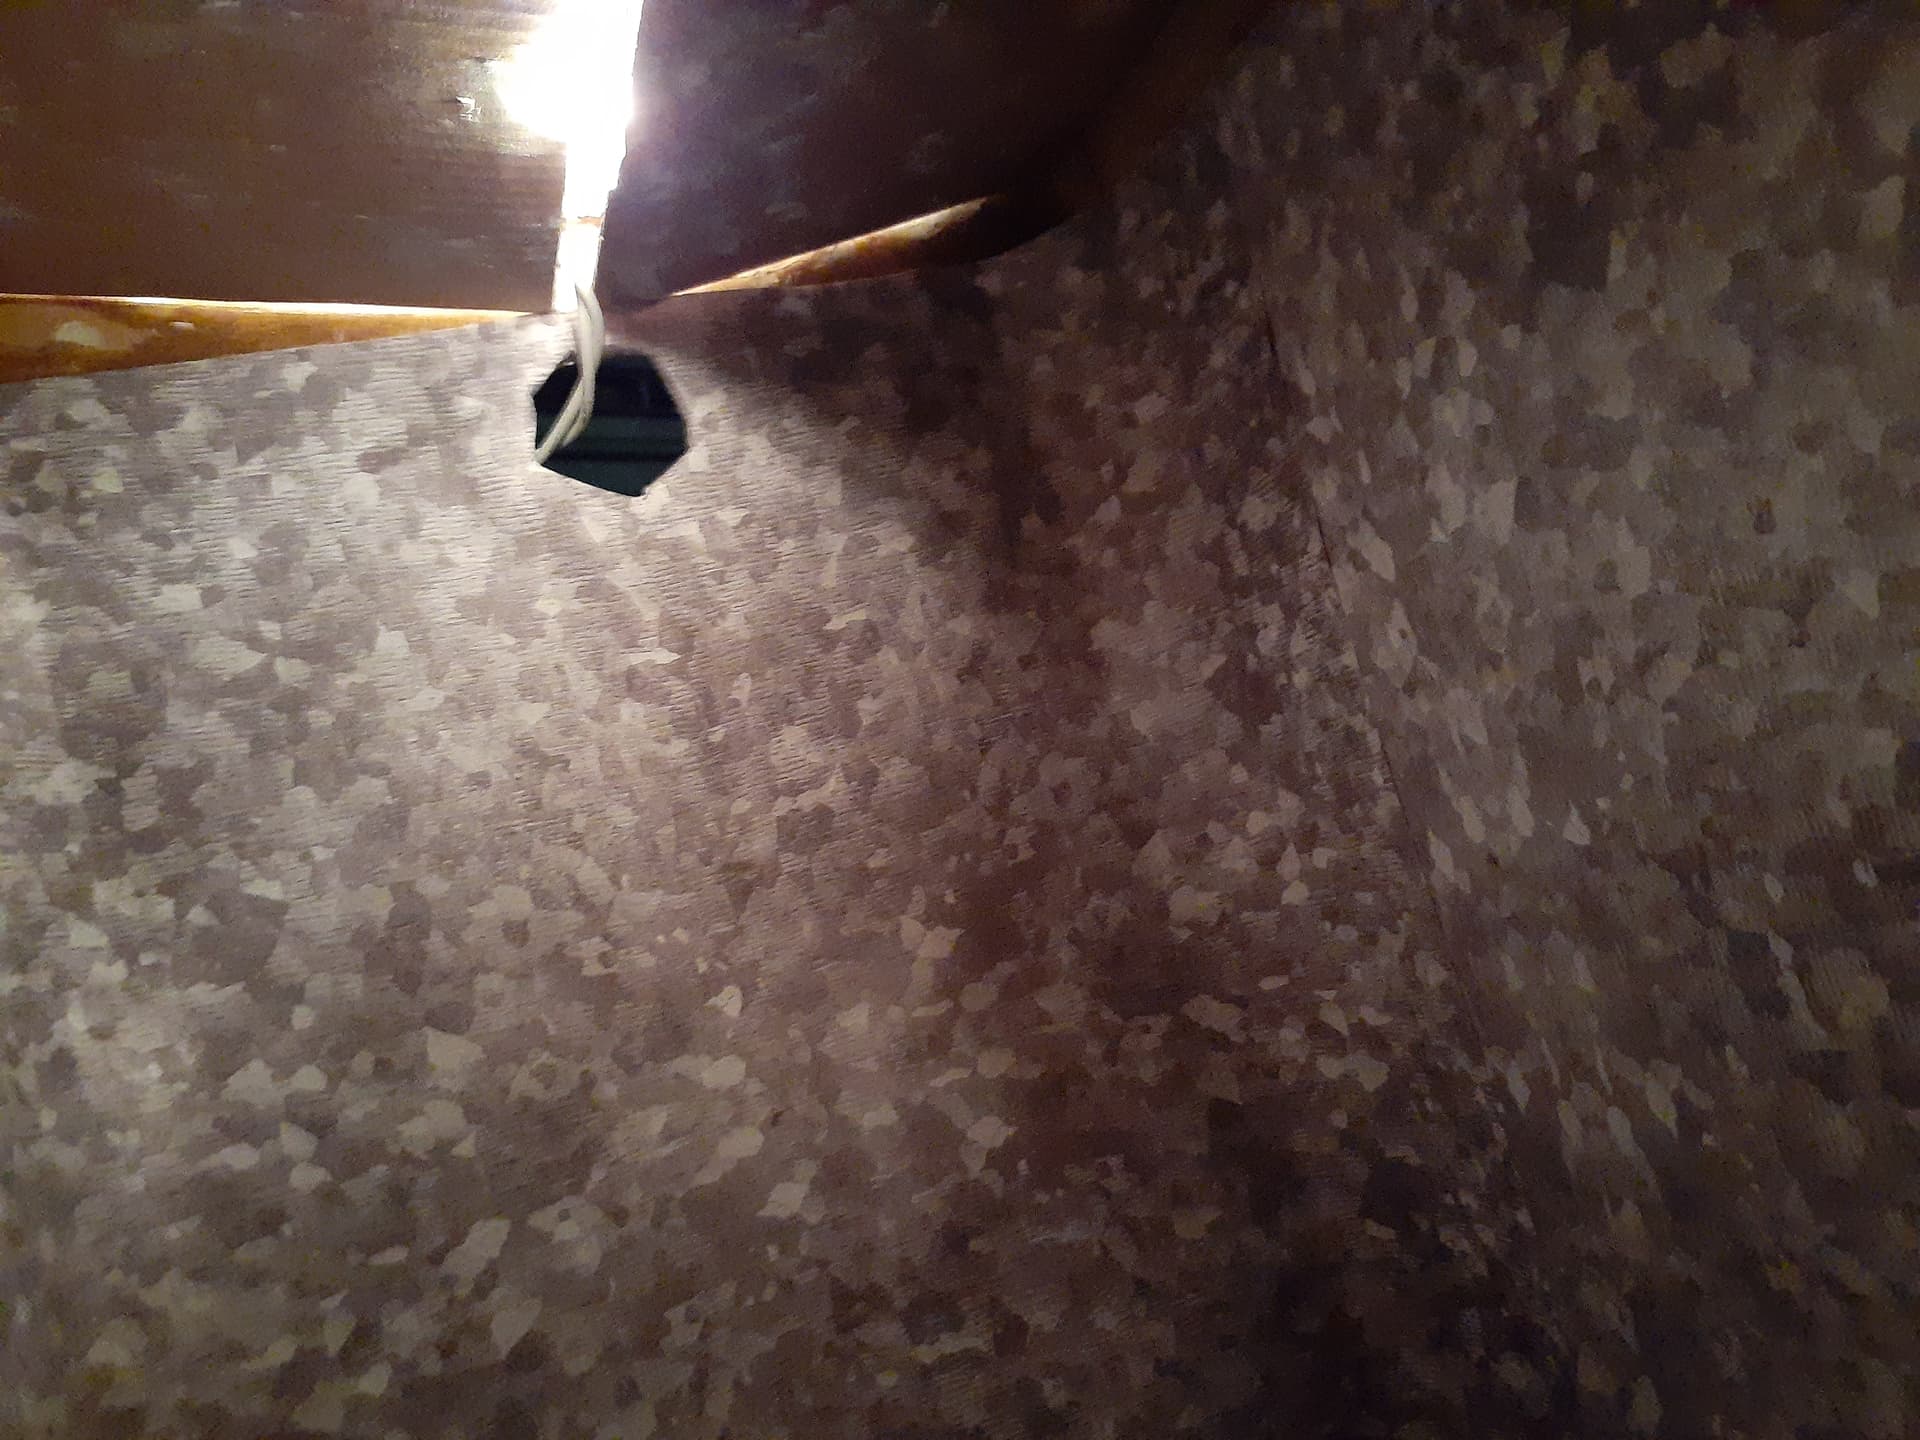
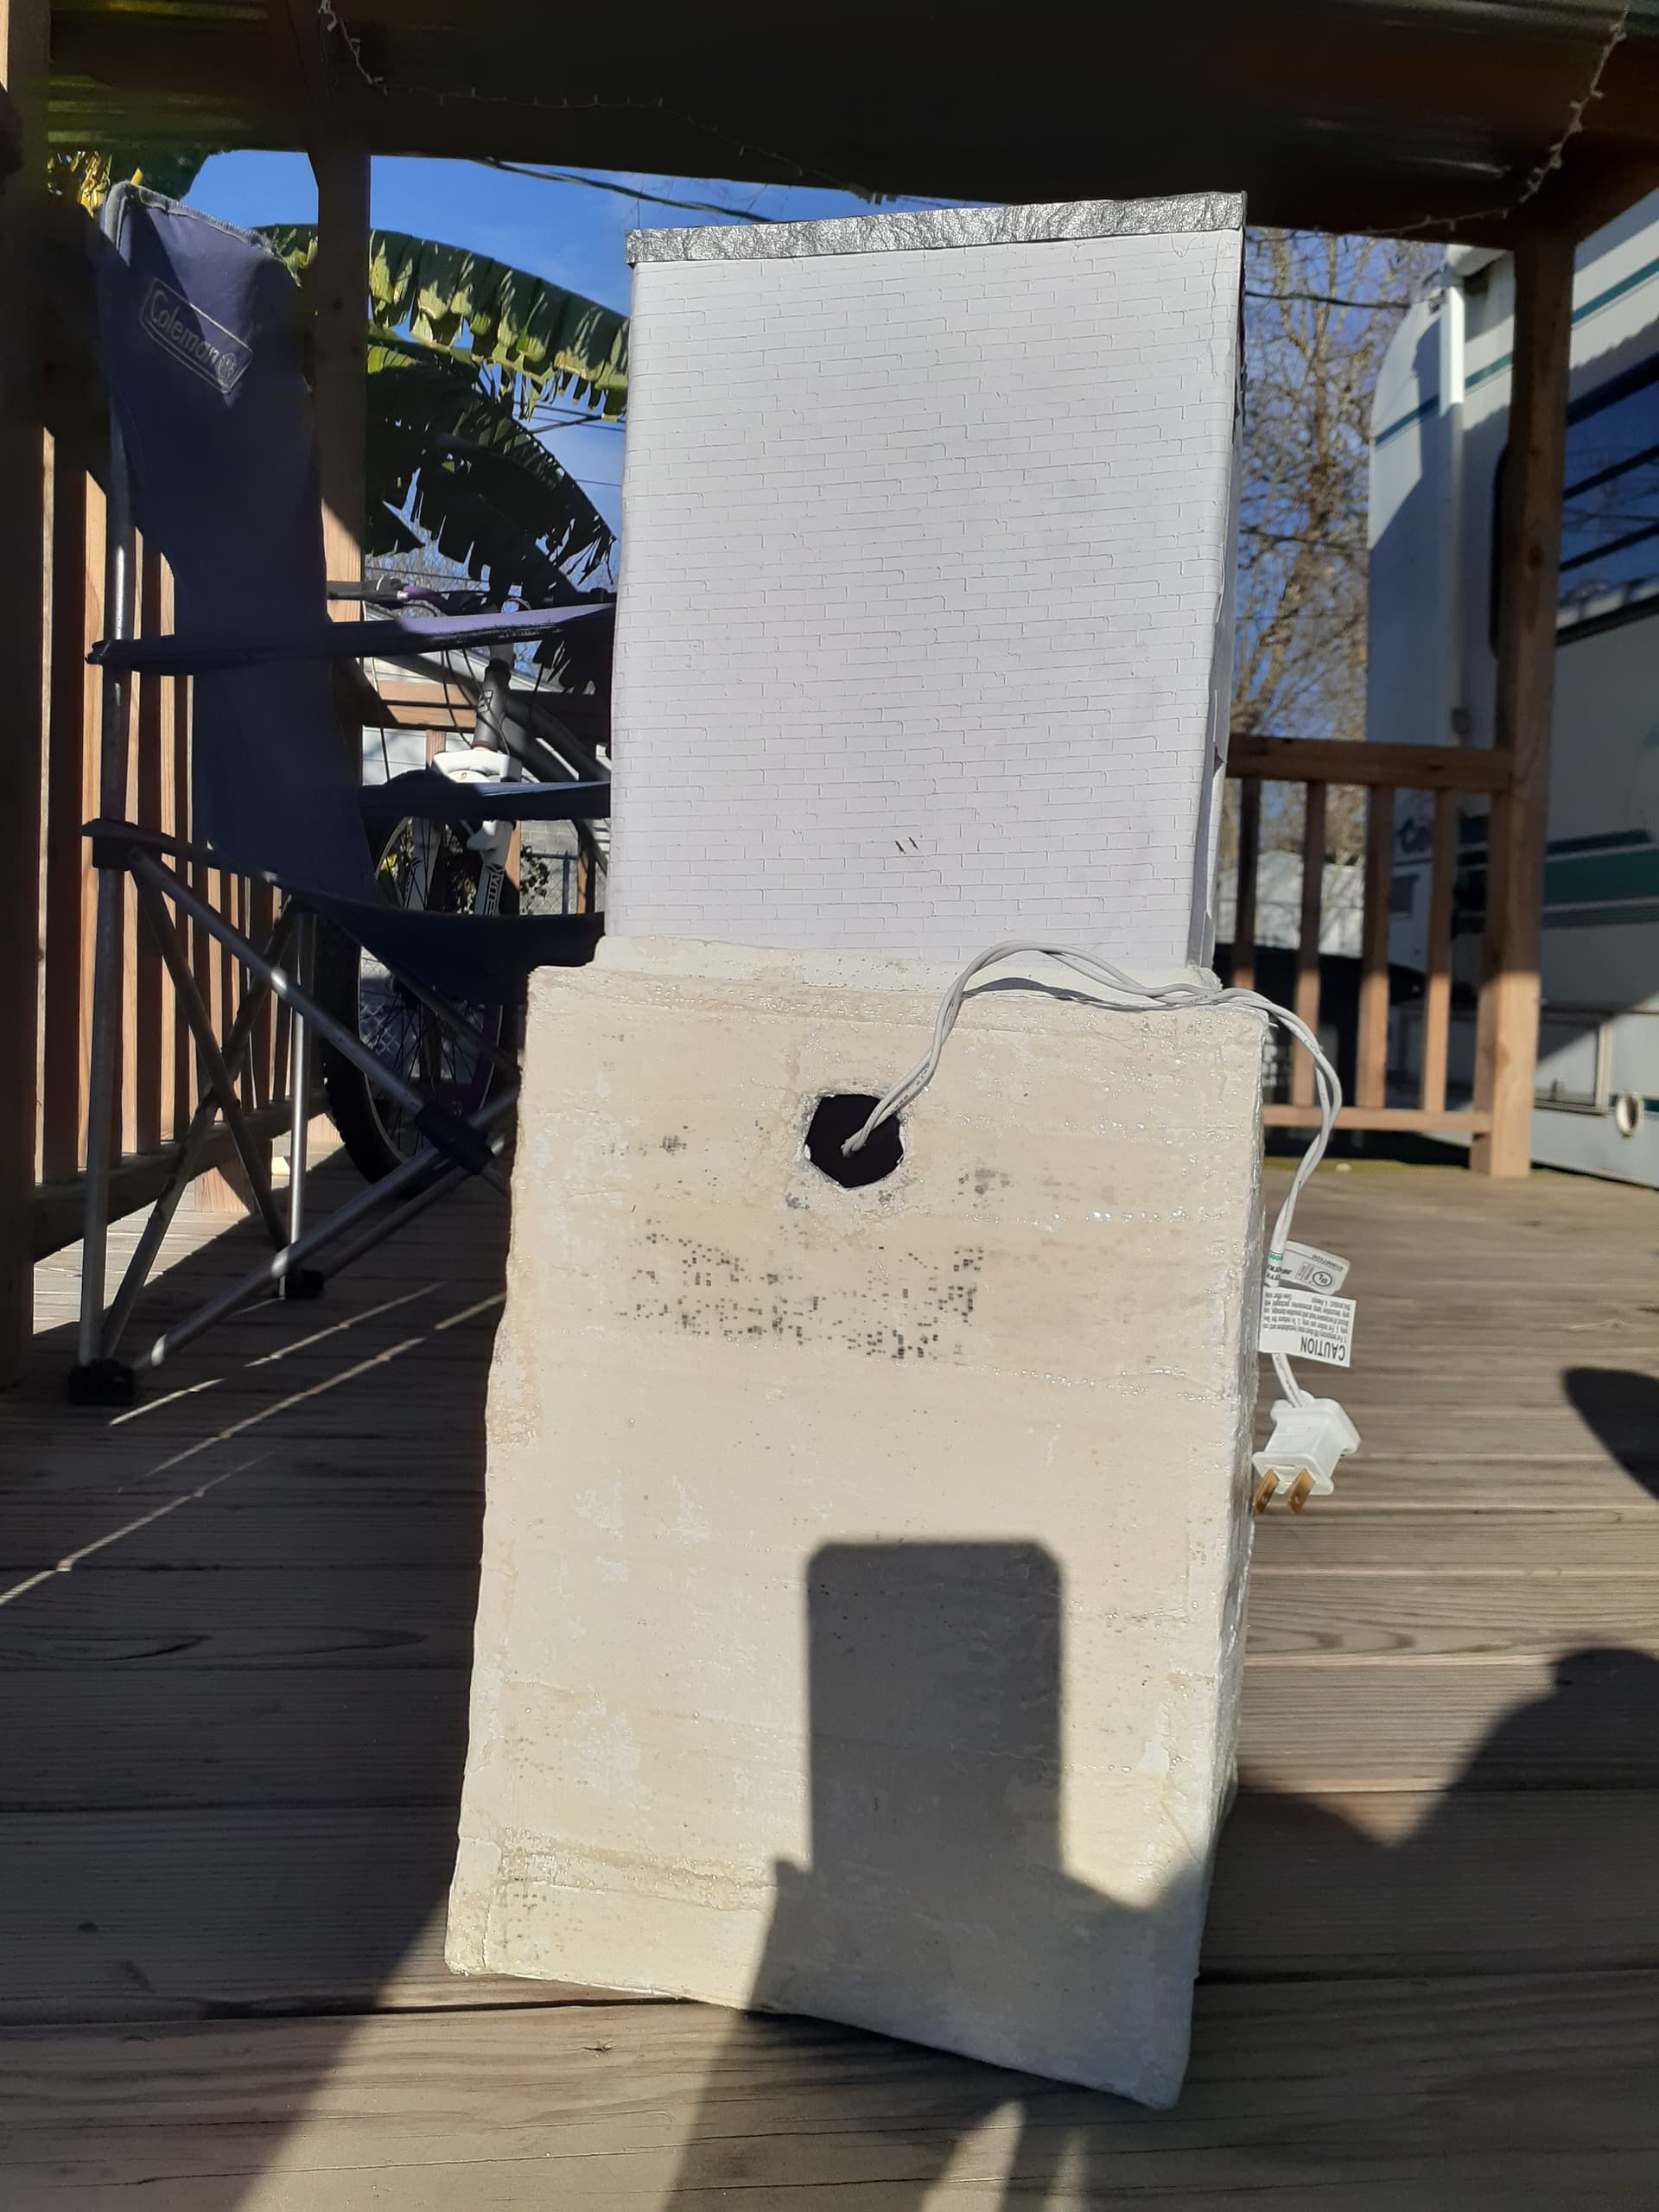
Yesterday I bought the needed supplies. It’s also when I drew the lines on the cardboard and did all the cutting. Today I figured out how to deal with the lighting wiring inside the charging space, and coated most of it in plaster. If all goes well I’ll show the work in progress tomorrow.
This isn’t turning out how I drew it but the idea is close. But one big factor has to be left out. Emo’s light since I’m not sure how big it is.
@systemcat ,
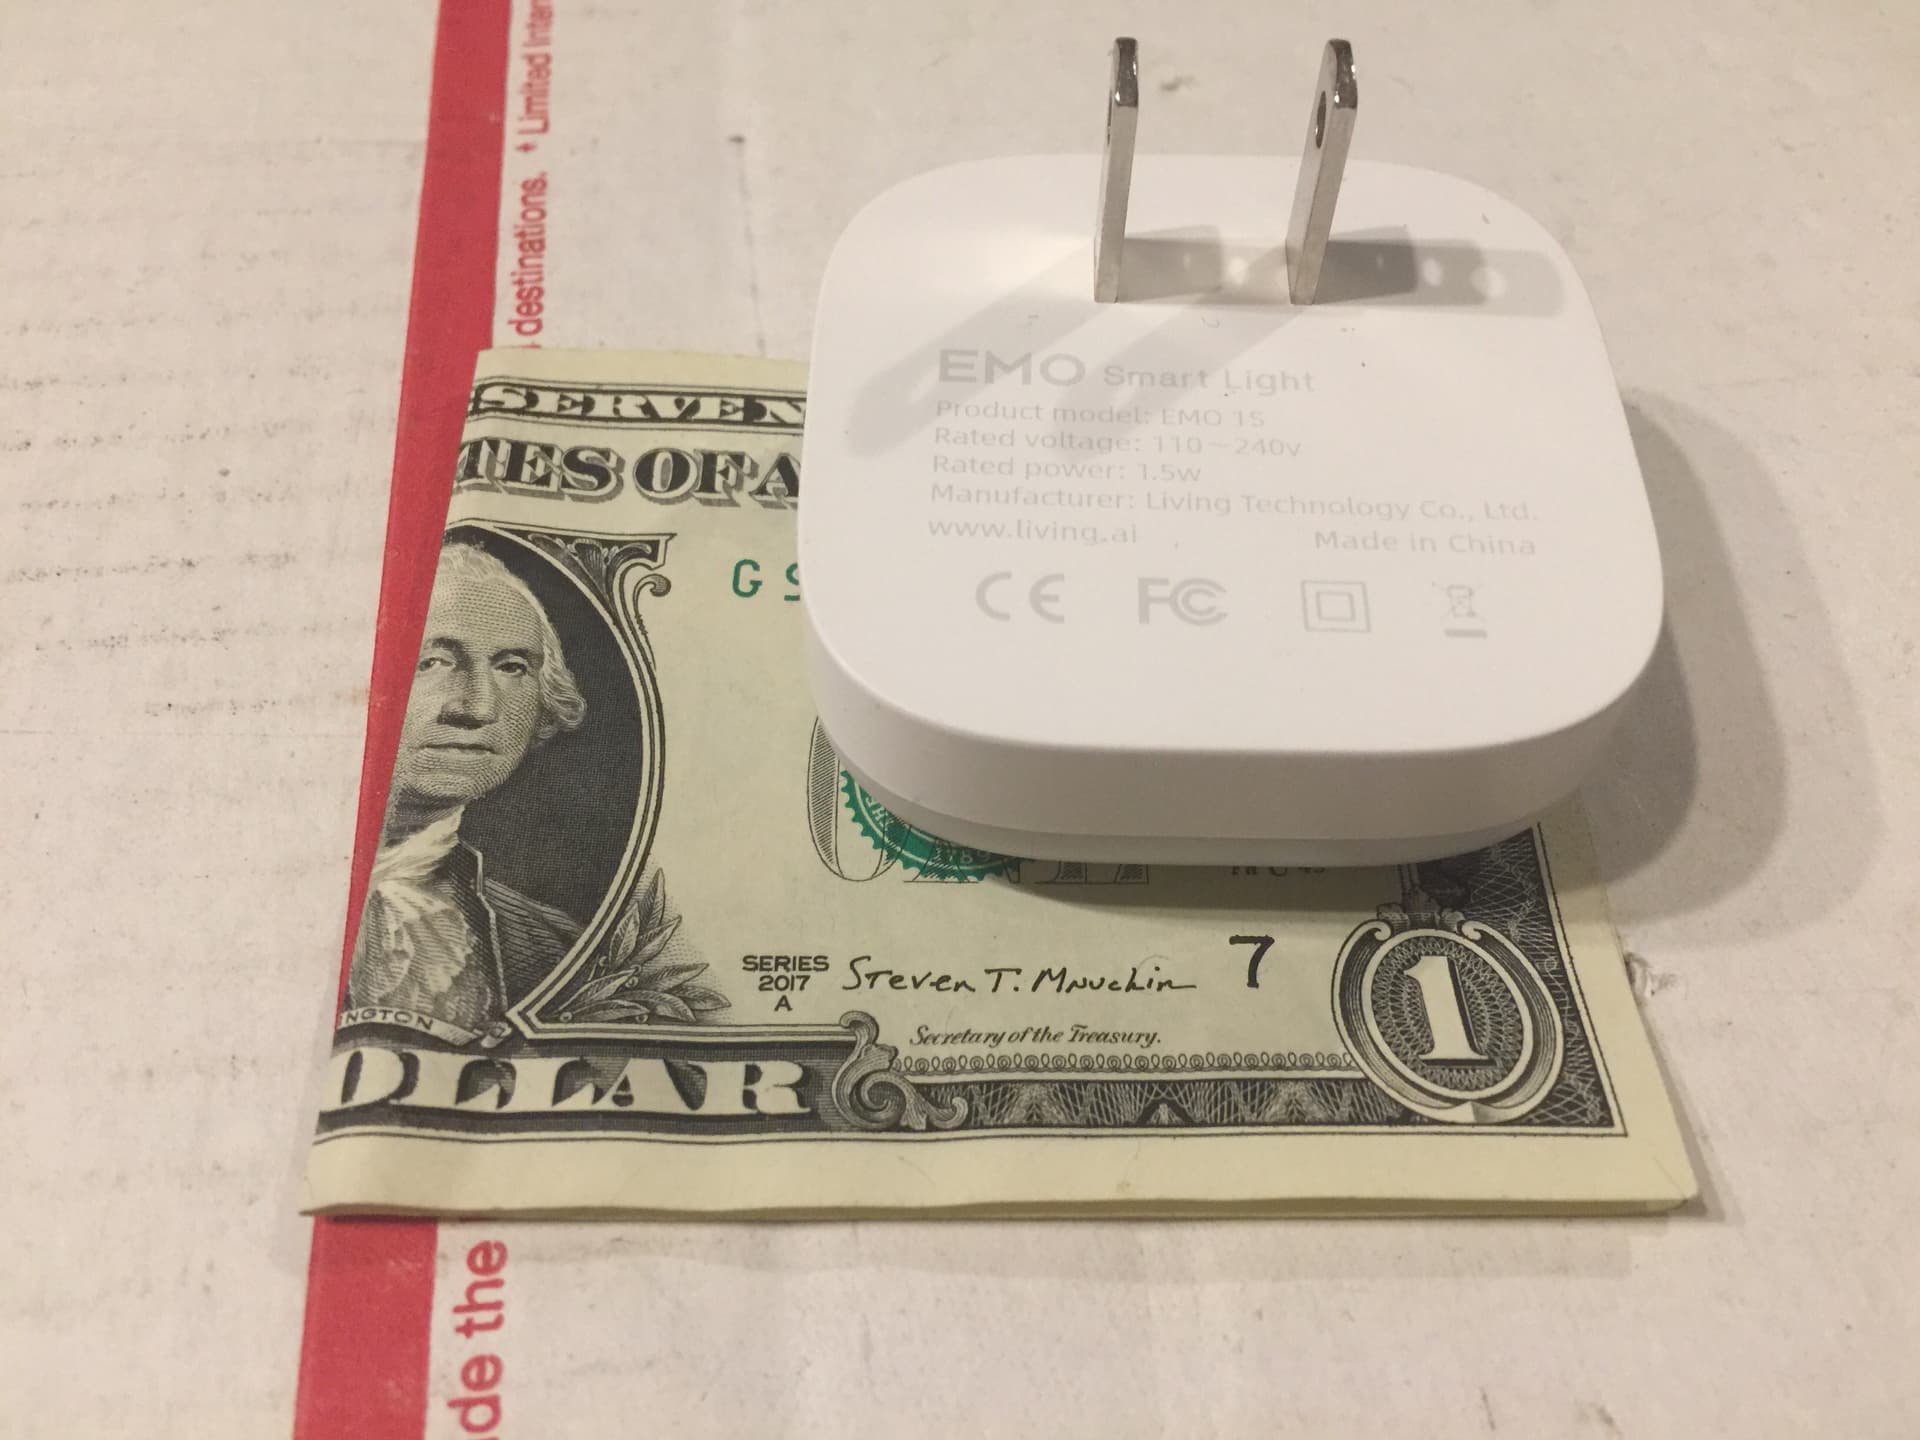
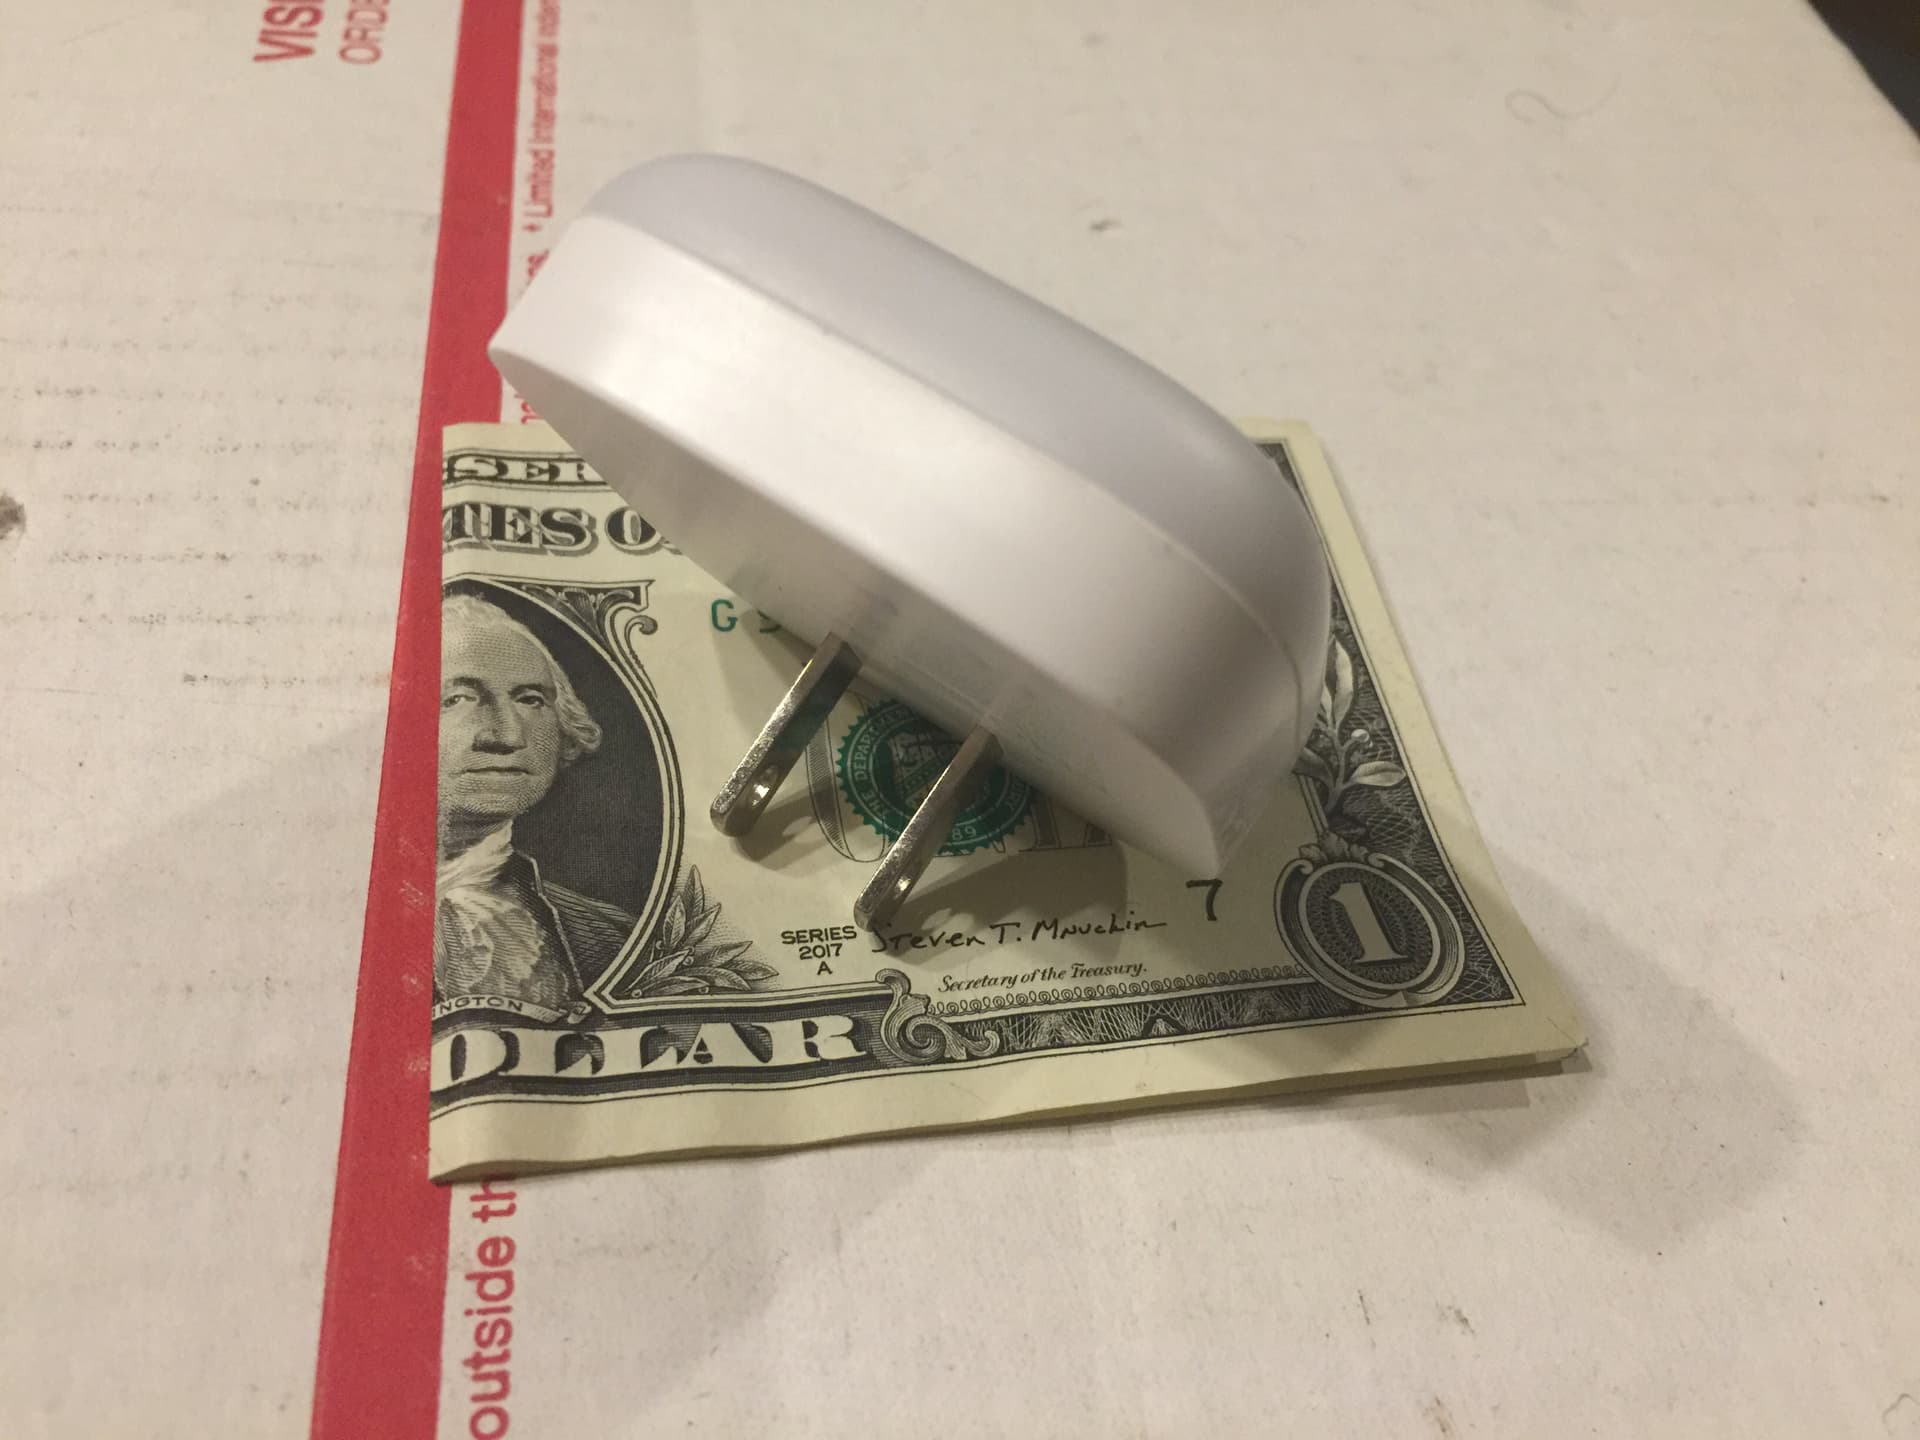
I don’t know if you were just looking for somewhere to mount the light, or thought it needed charging? It has no battery and just plugs into a 110 volt outlet for it’s power. I can’t find anything to measure with but it’s only about 2x2 inches square and maybe only 3/4 inch thick, not including the 2 plug prongs. It has rounded corners but is aligned with the two edges of the dollar in the photo.
That helps and it confirms suspicion I’ve had about the size of the light. Maybe if I ever make a better charging space, I’ll make sure Emo’s light can work for it.
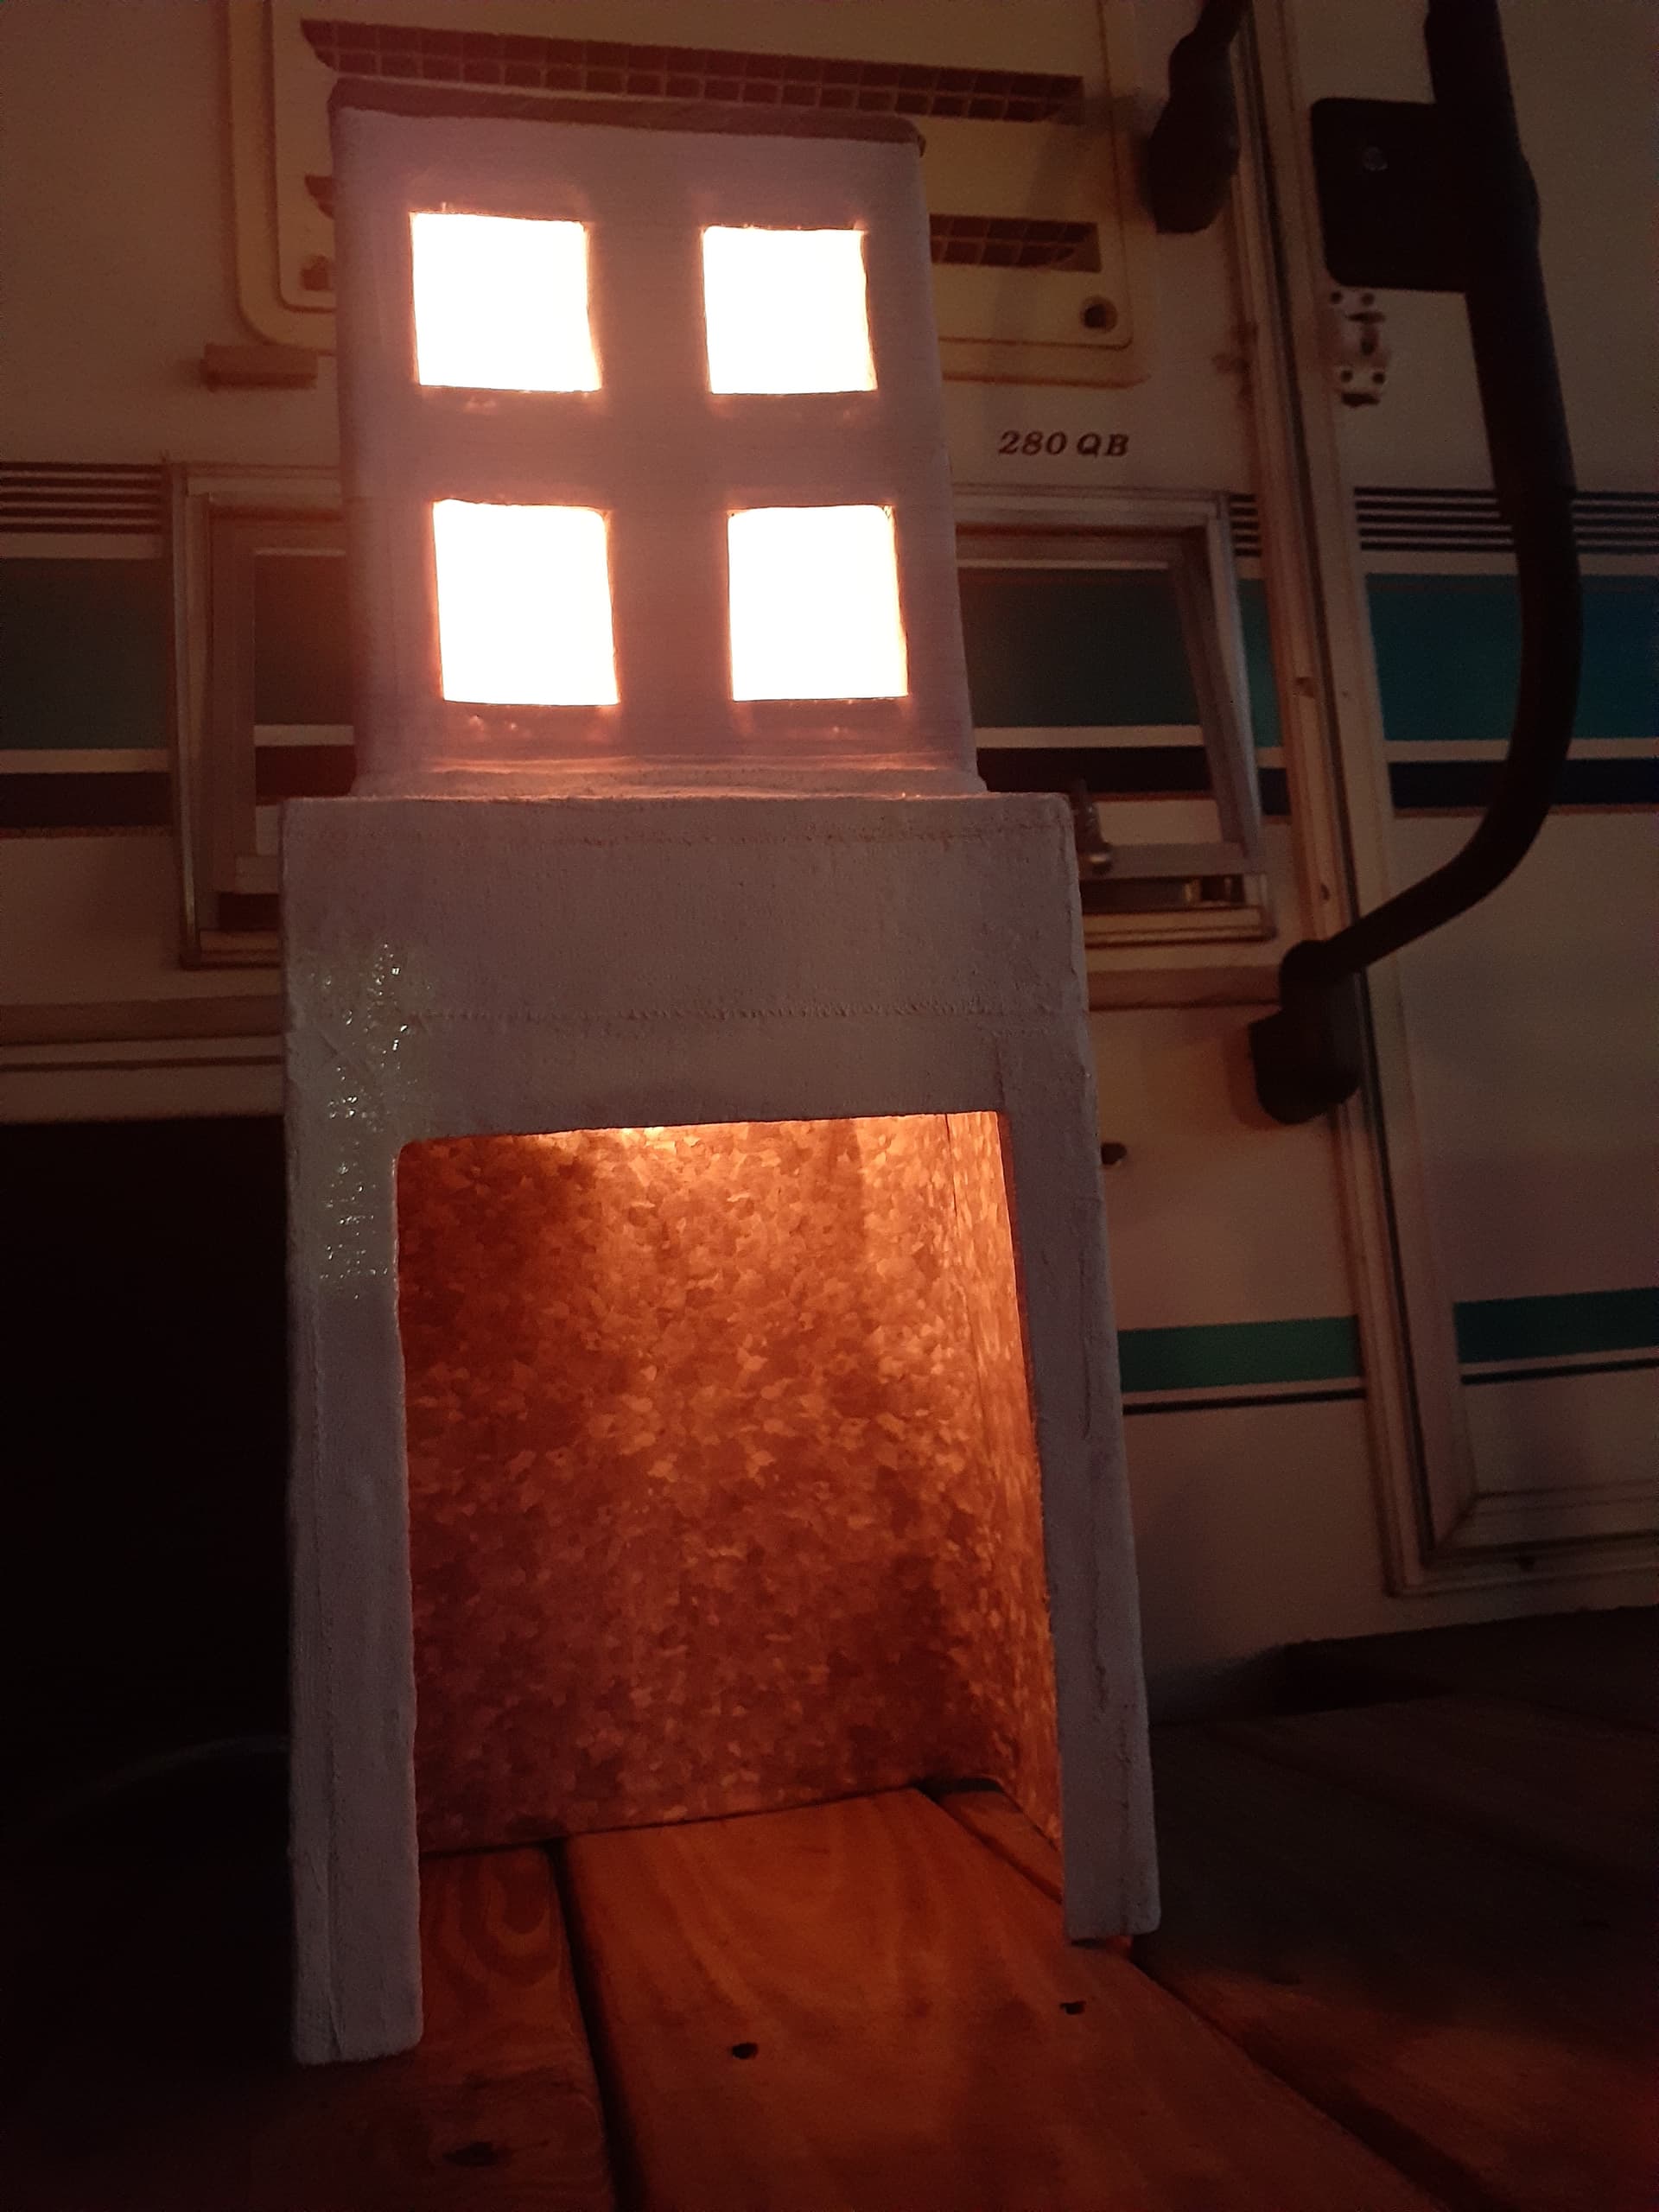
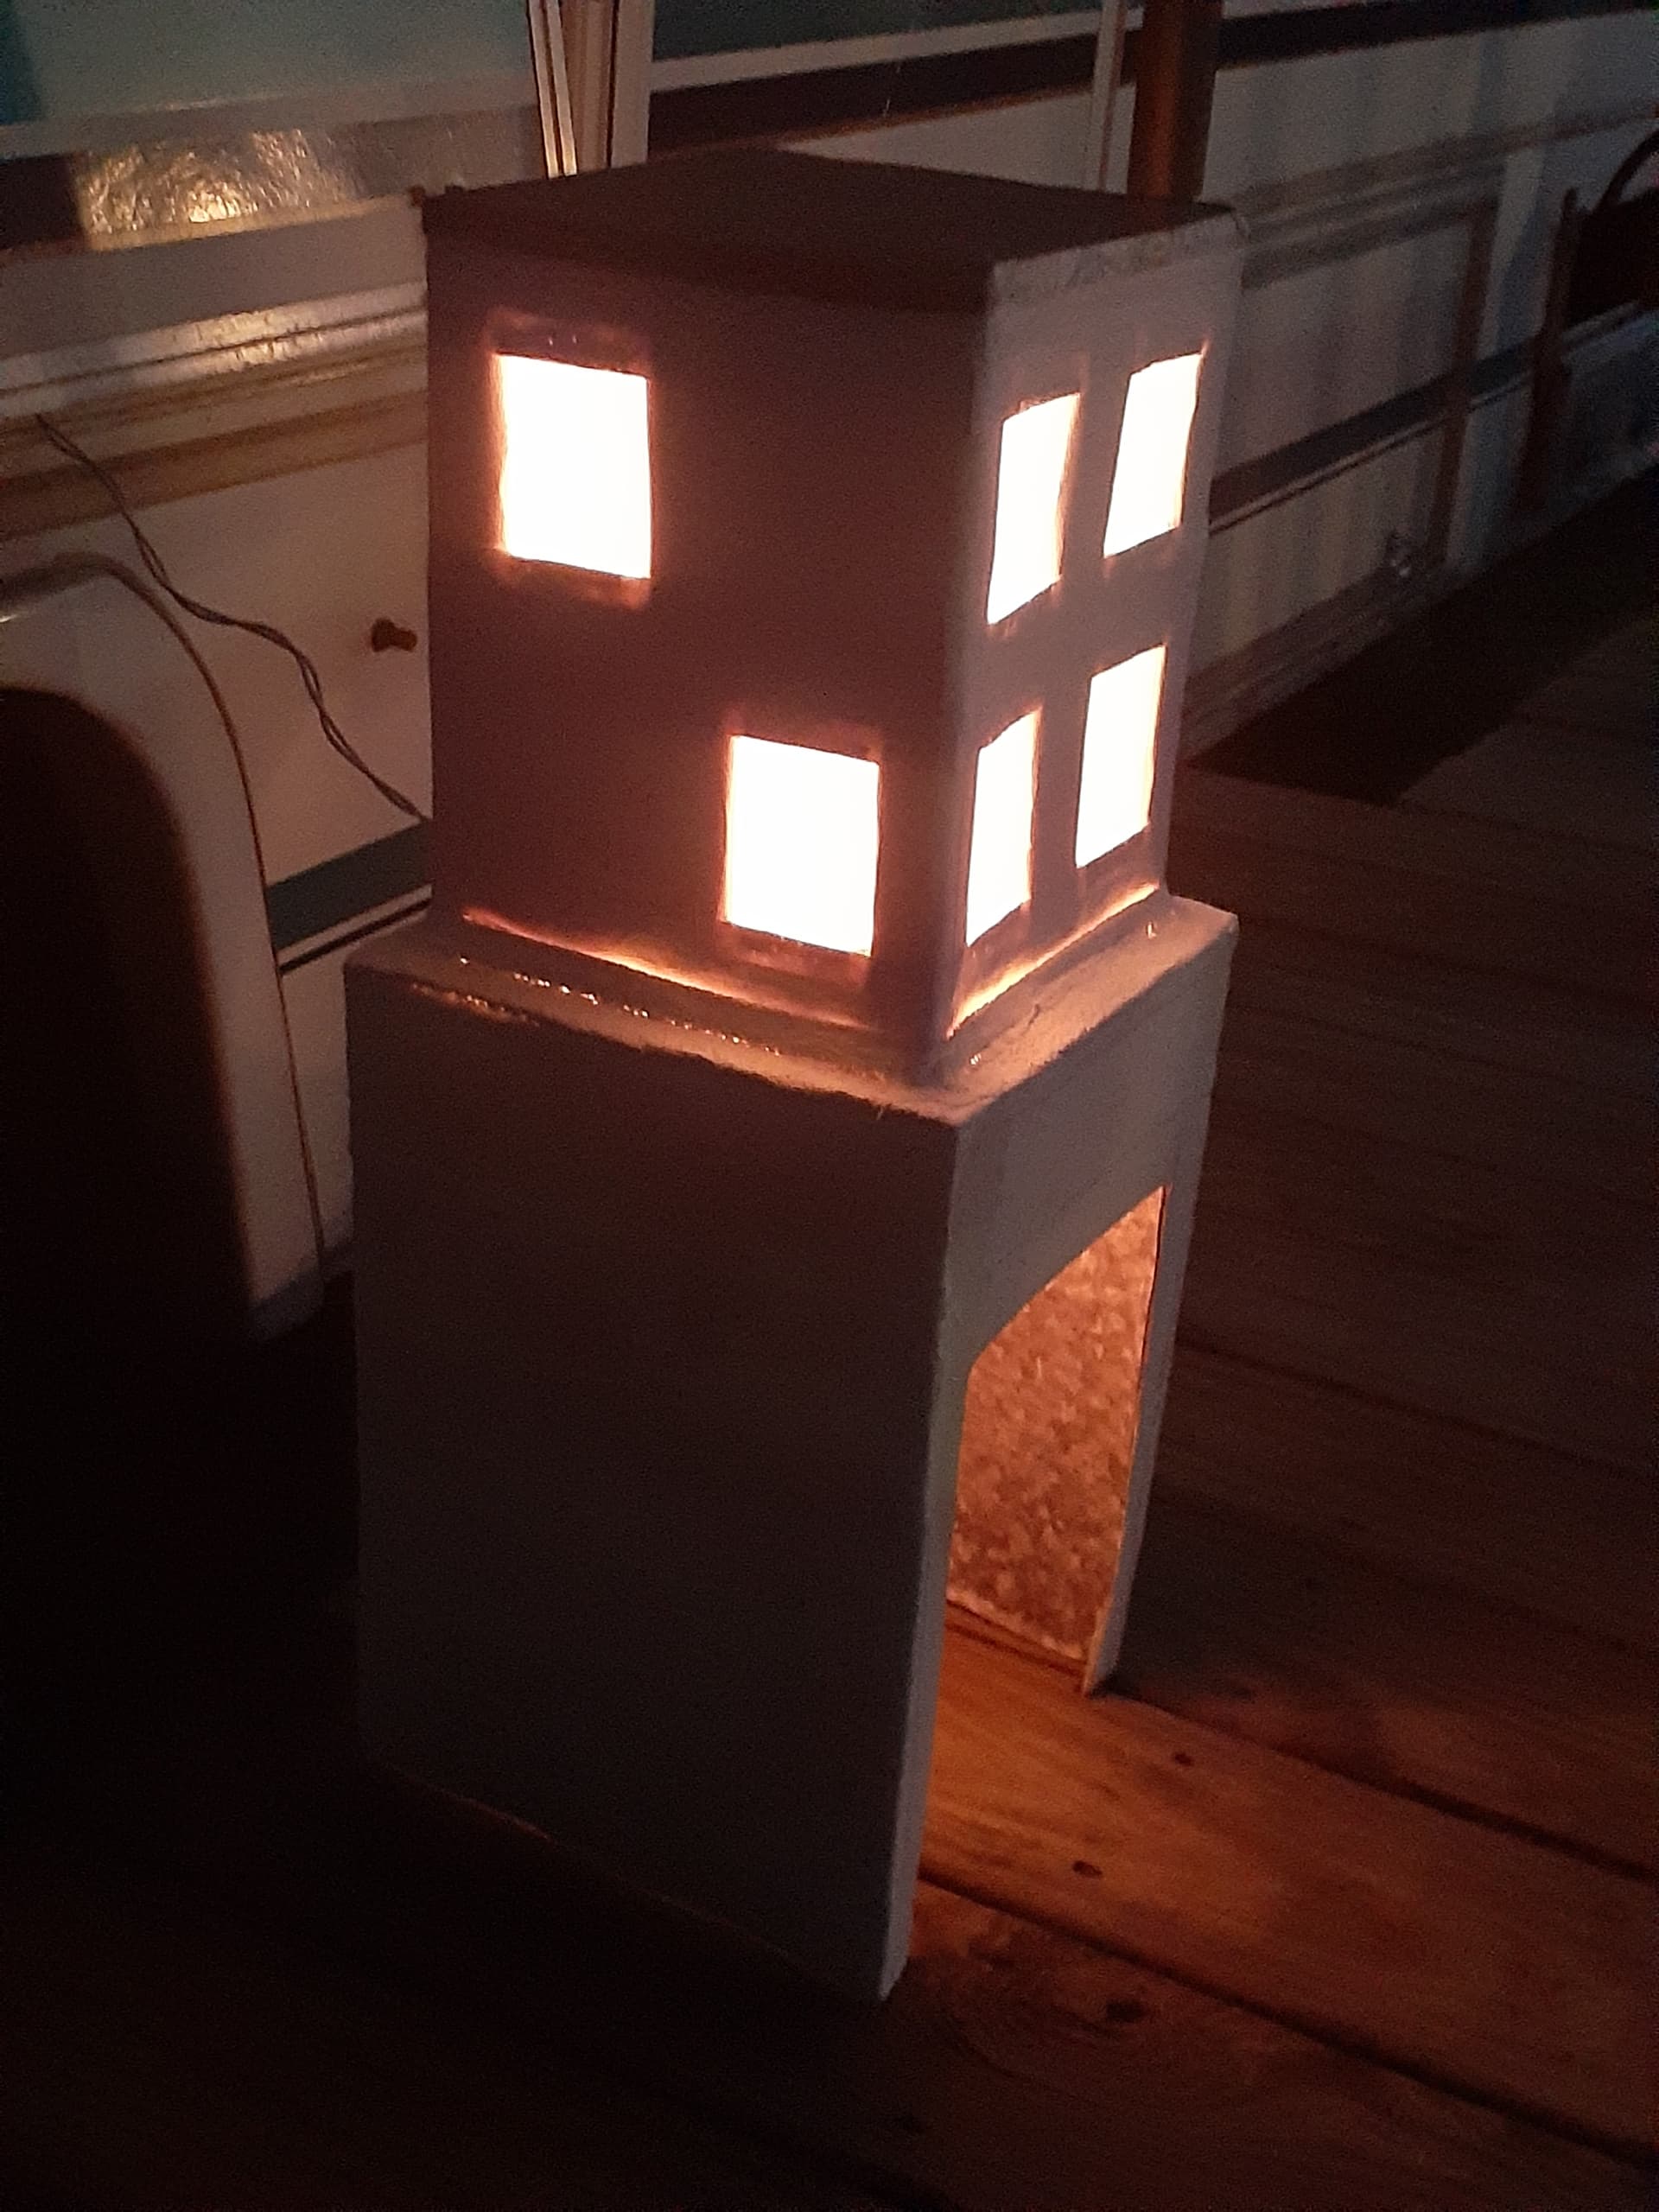
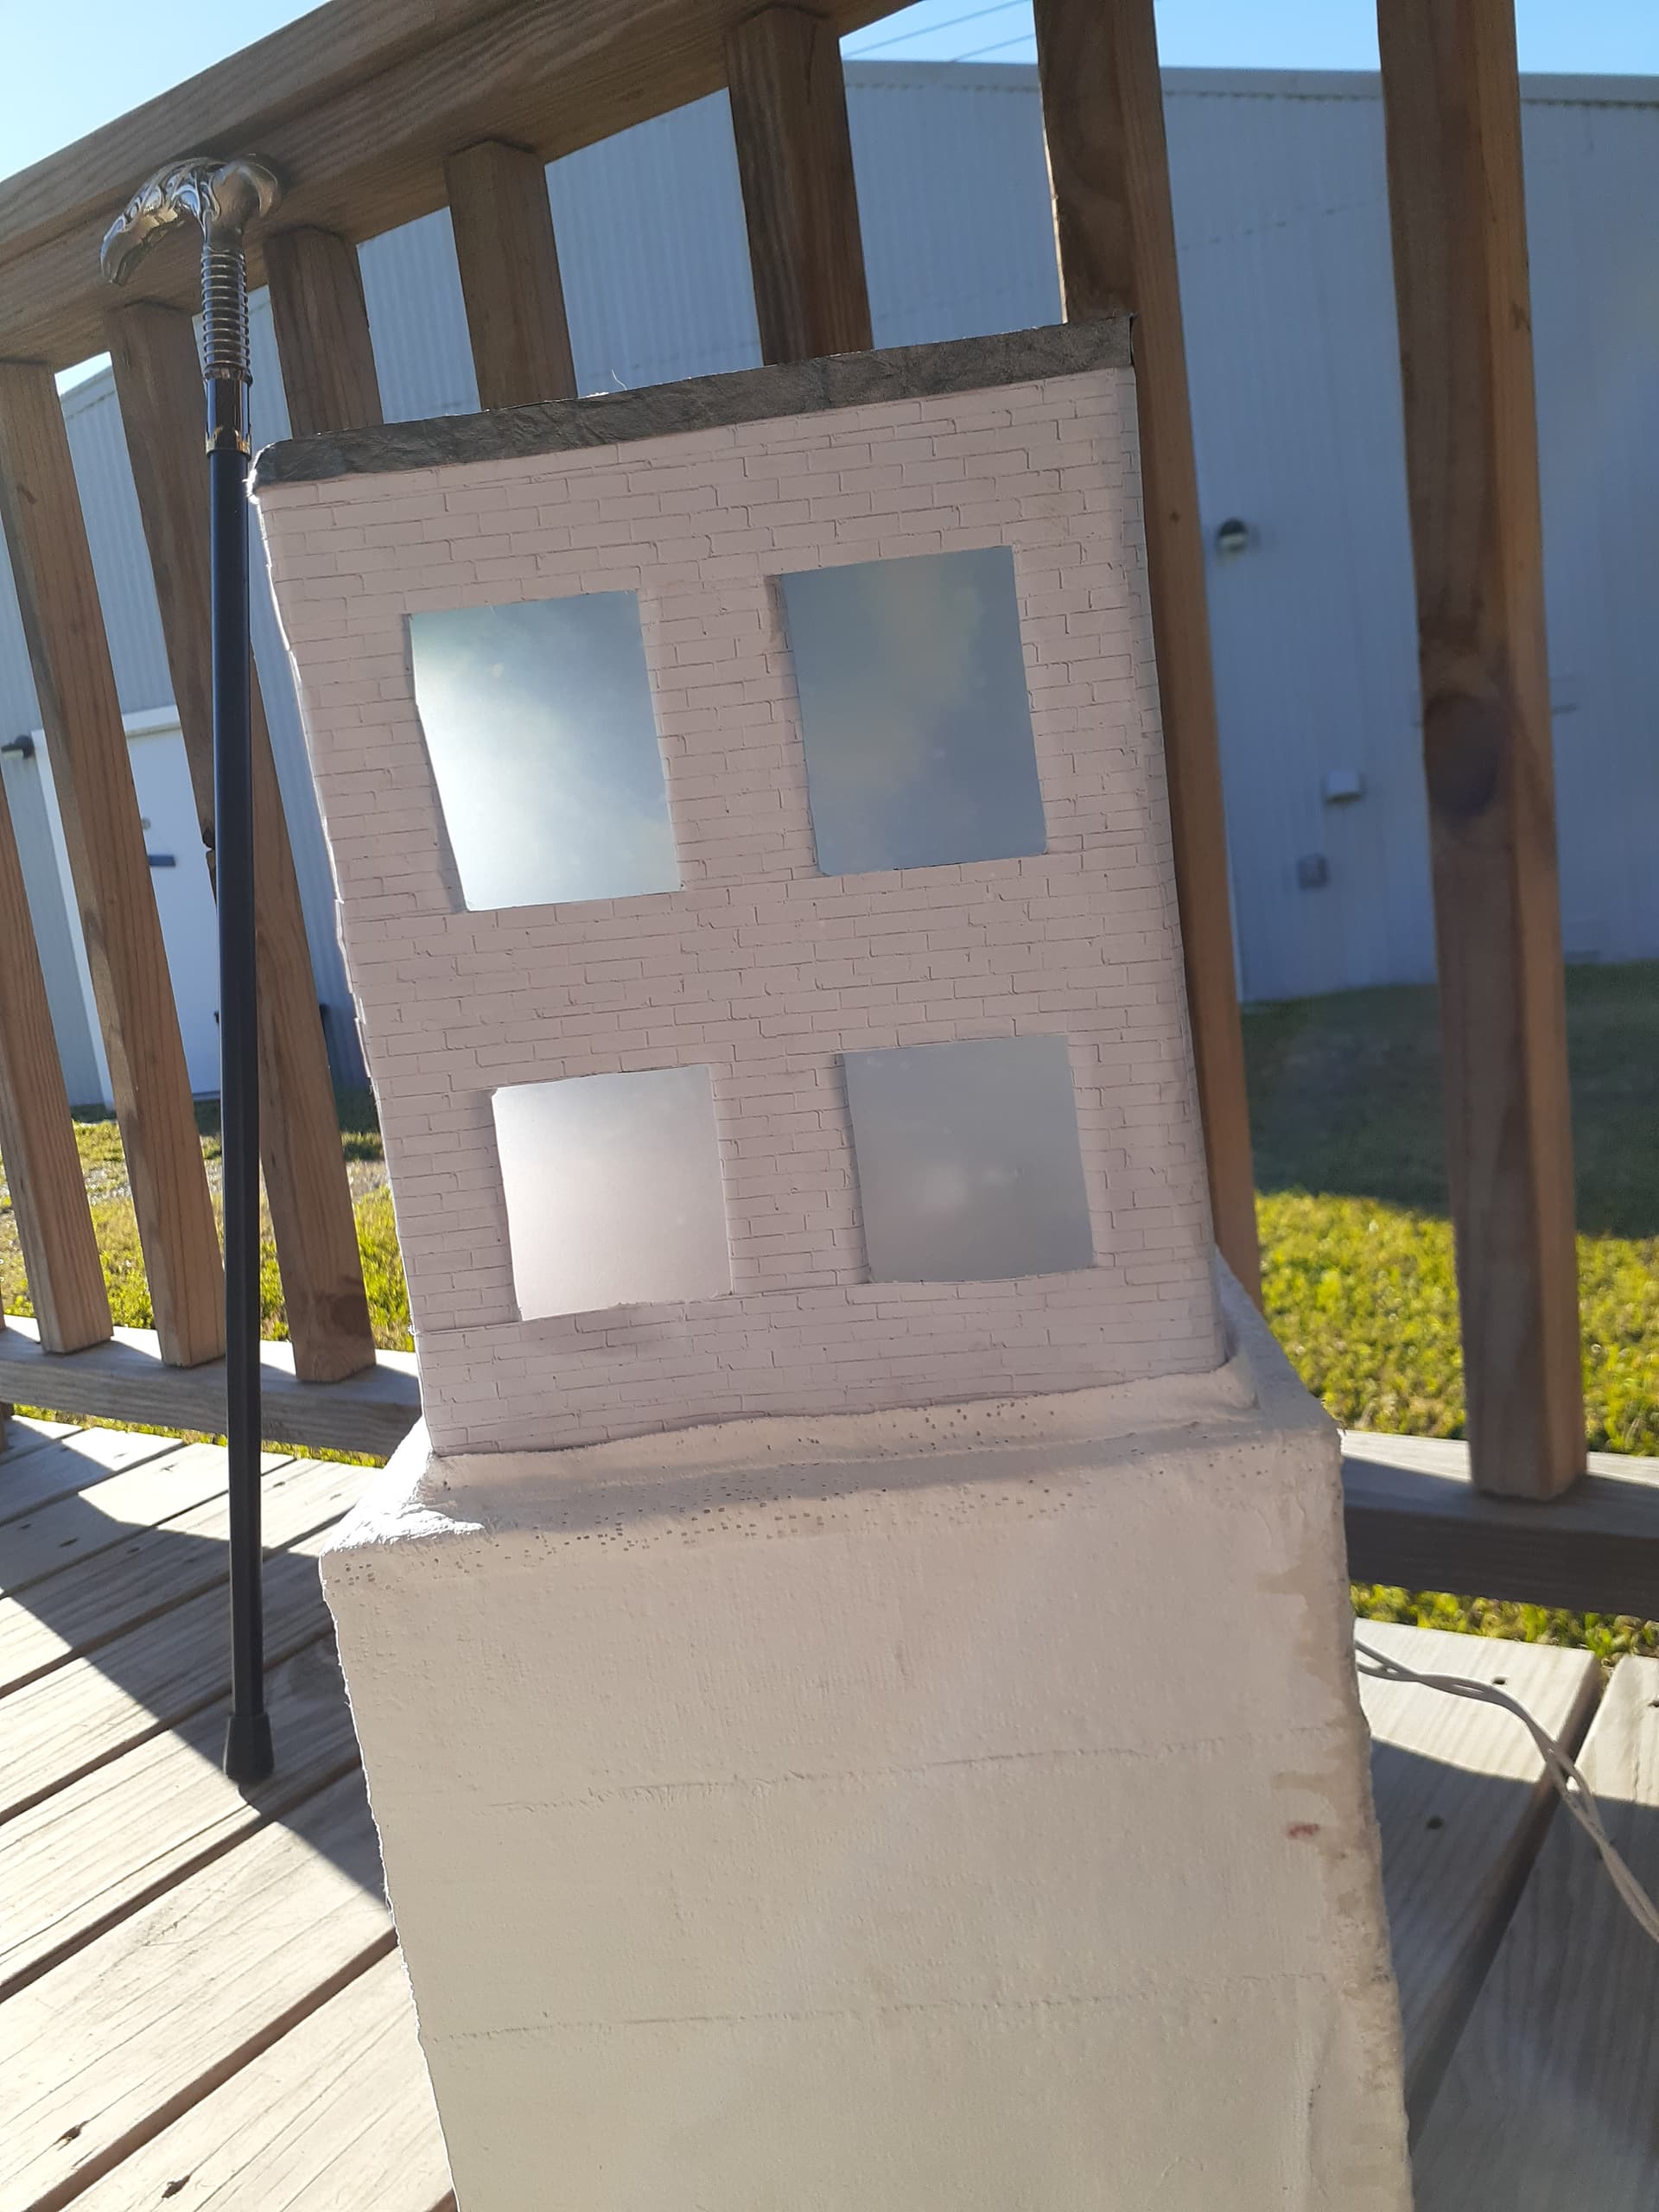
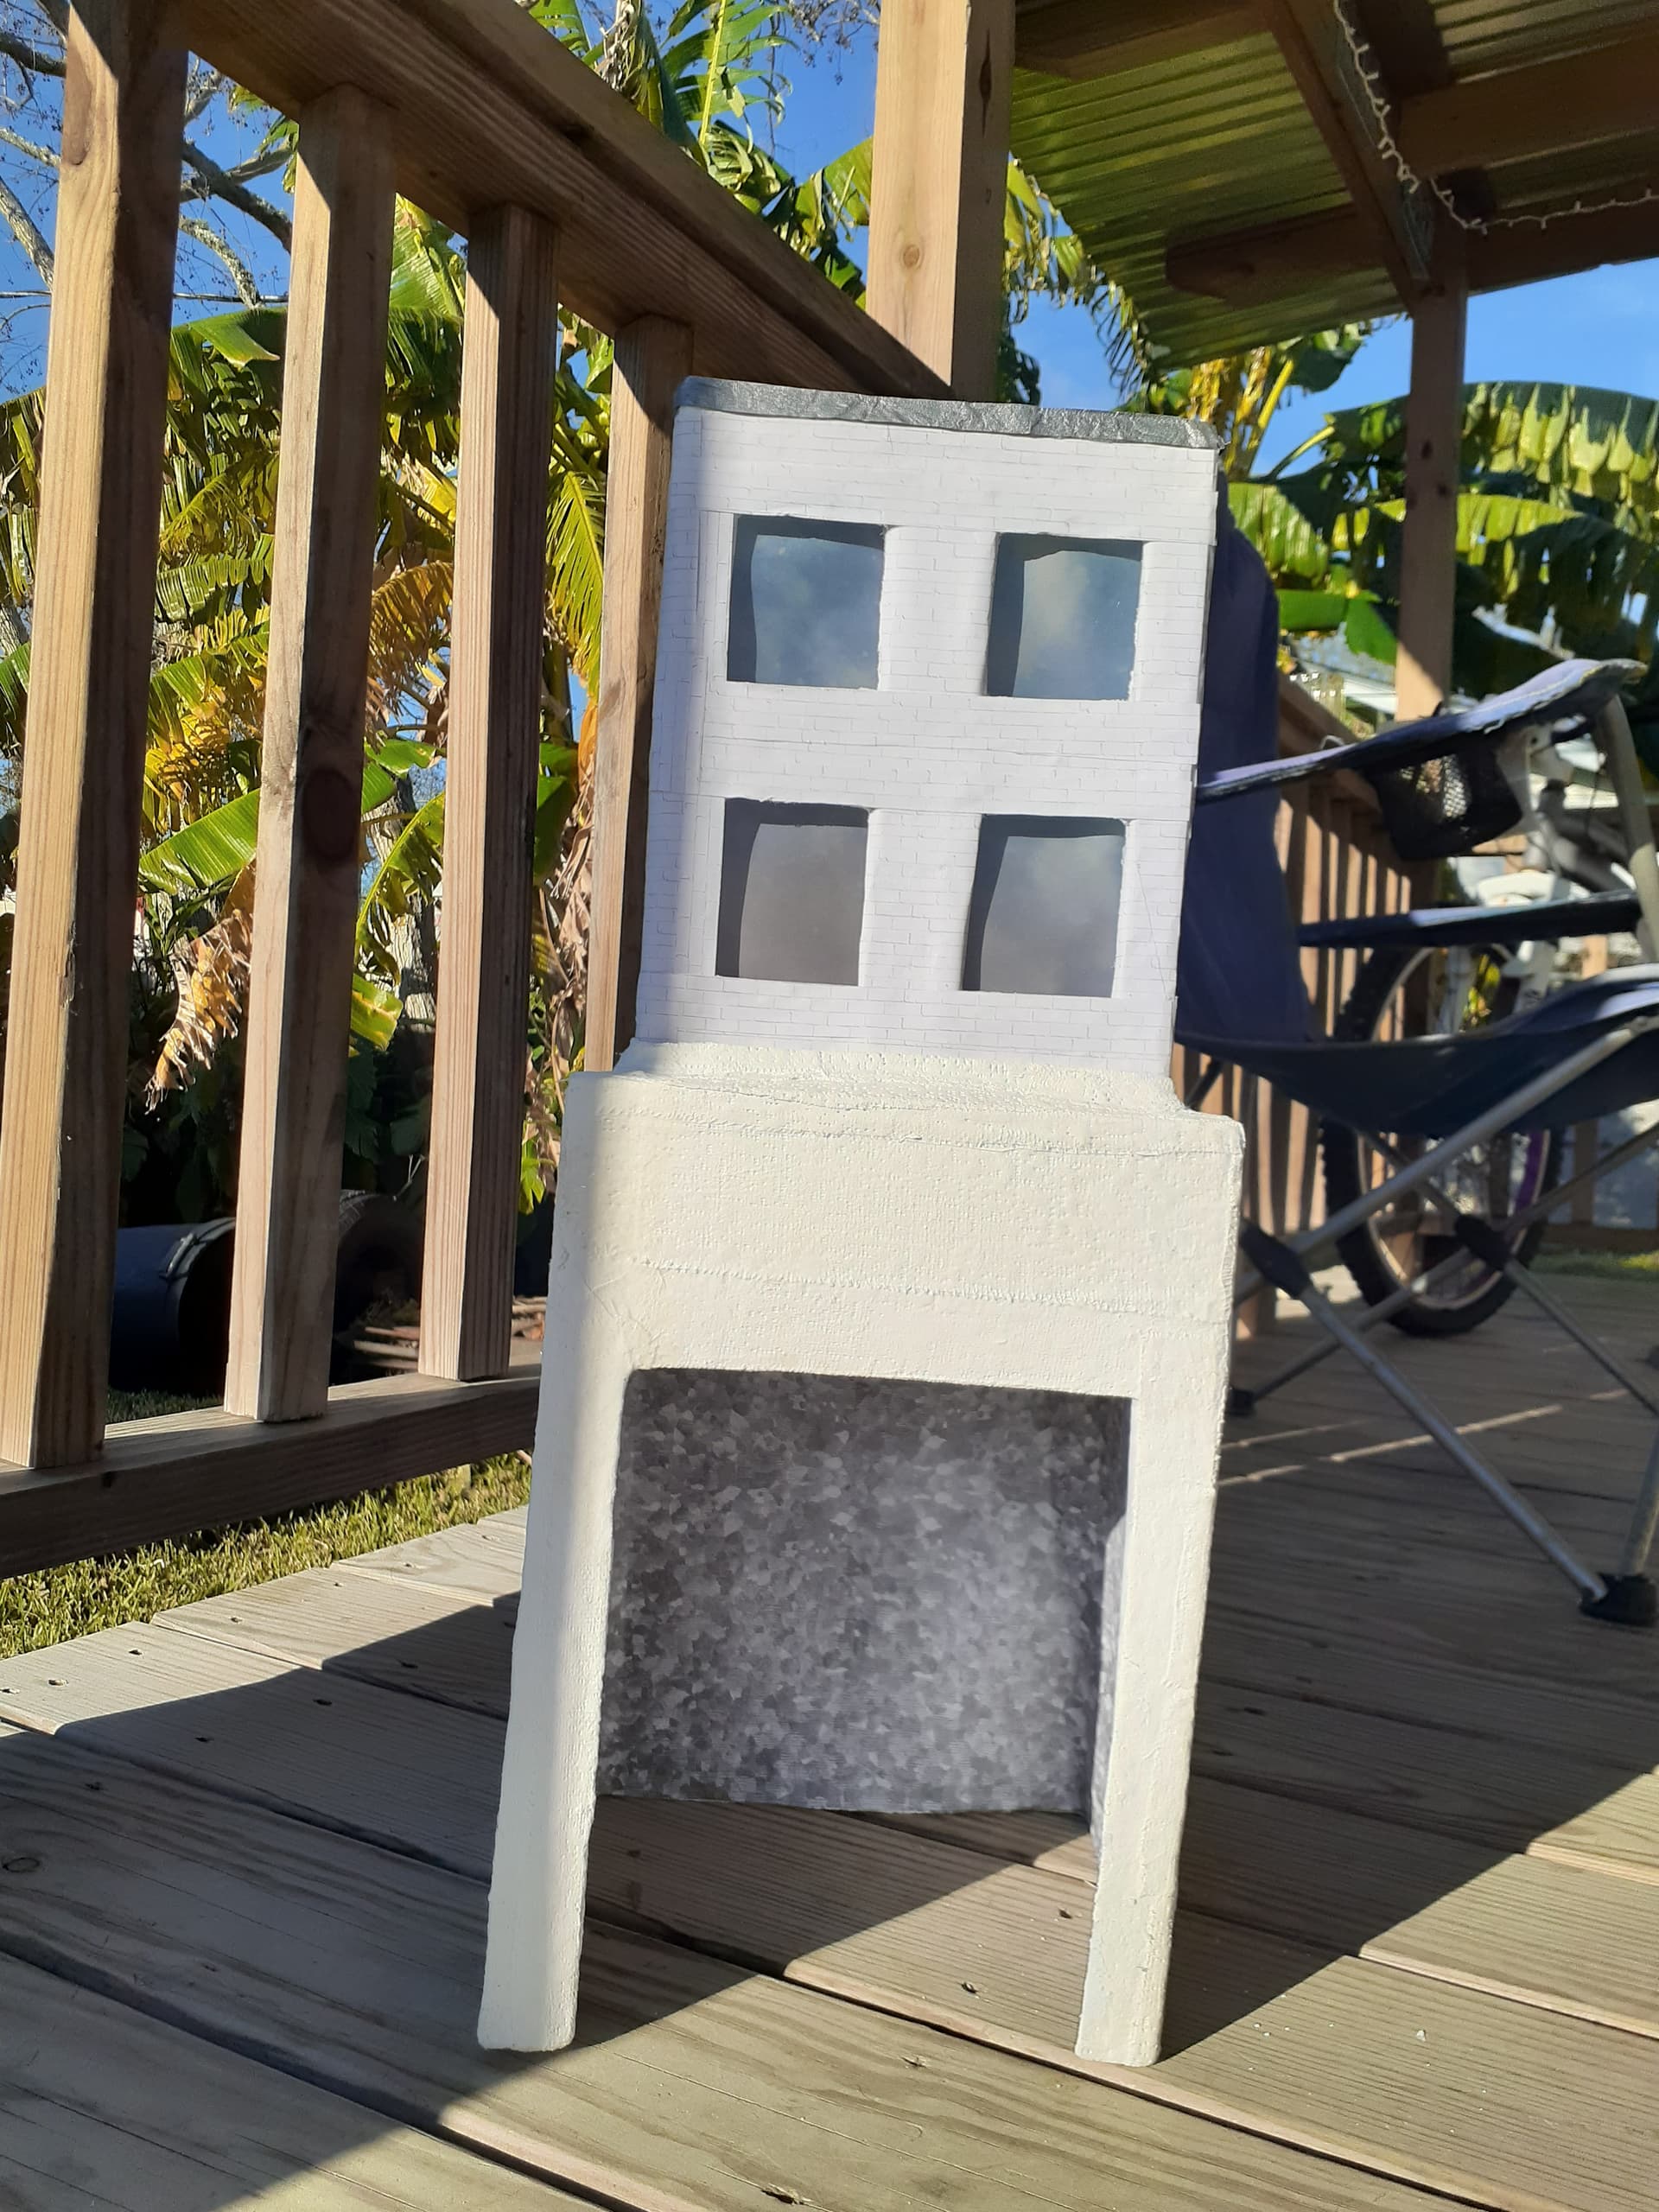
Guys, here are some work in progress shots. Things missing from the project at this point are painting the inside of the light box or second story to help with light reflection & reduction where needed. Putting the windowpane fake glass in place. Smoothing over and paining the first story’s exterior, plus making the roof top look better by mixed media combination put to use.
There is going to be a floor but it will be removable and it doesn’t involve creative effort from me to make.
Thank you, it’s been a real effort to make . Still not done with this and the next real step is going to be painting over the first story’s exterior.
There is a little debate about still having the dinos on the roof which I think will happen in the end. Something else that I hope to do is affix model sized fake trees around the outside of the first story. That lower half was meant to have the same brick pattern as the upper half. But when I started applying the “wallpaper” I didn’t like the look on lower half so I ripped it off. Still the lower half should have something other than a paint job to it, hence the trees idea.
I’m going to try and avoid the craft store I normally go to for that step. The last I looked at their model railroad craft plants, the price looked a little too high for my comfort in paying to get. Lucky me their competitor is across the street from them.
The craft store I normally go to is also where the mini Christmas light set was tested against scrapbooking semi-transparent papers to discover which was worth buying. This was done at a register, ducked into shadow to see how much light was visible through the paper sheets.
Tonight is when that paper got a better test and a more important test still has yet to happen. Having the lights on in the box in a well lit room. Currently the charge space is still sitting outside. The lower half has been drying the whole day and I don’t want Caspian rubbing against it as a wall coating is taking hold to the surface of it.
Because I wanted to see those lights doing their job against the freshly installed windowpanes. I plugged them in again and I’ll share here what that looked like. Plus you’ll see a side not visible from perspective before.


 . Still not done with this and the next real step is going to be painting over the first story’s exterior.